
How to sew a no-trim flat felled seam
This is the first of two tutorials to go with my PDF pattern, the Pack-it-Up Shopper. See the second here.
You may have seen a lot of great instructions online for flat felled seams. They are commonly used to create a strong, flat seam, where the inside is neatly finished and you have two lines of top-stitching on the outside. The usual way to create this seam is to stitch the usual allowance with the right-sides out, then trim down one side of the seam allowance before folding over the longer side, then edge-stitching to finish. It is a nice seam, similar to the one you find on quality jeans. But it isn’t the same seam!

If you look at the seams on a pair of jeans, you will see that the inside of the seam looks identical to the outside. (Not all jeans; I have some that are overlocked/serged then top-stitched). The advantage of this is that it is really, really strong. The fabric is folded on both the pieces that are being joined, creating four layers of fabric which are then stitched twice. That seam isn’t going to come undone in a hurry!
When I designed the Pack-it-Up Shopper, I knew that I wanted to use the proper flat felled seam for strength. I had been shown how to stitch one years ago, when I studied Fashion Design (we had to do miniature samples of all sorts of processes!) but I struggled to find instructions online that I could point people towards. I did find two videos on YouTube, here and here, which are great, but not quite how I planned to do my seams. In industry, the seams are created with a special foot and a twin needle. My version uses my trusty 1/4” machine foot, or could even be stitched with a standard machine foot.
To create a no-trim flat felled seam, you will need:
quilting clips, pins, an iron, plus a 1/4” machine foot and a seam gauge (both optional)

Step 1
Press a 1/4” hem on both of the fabrics you wish to join. My seam is facing to the back, to create a smooth line, so the hem on the front piece (the darker fabric) is pressed to the wrong side, and the hem on the back piece (the lighter fabric) is pressed to the right side.
Step 2
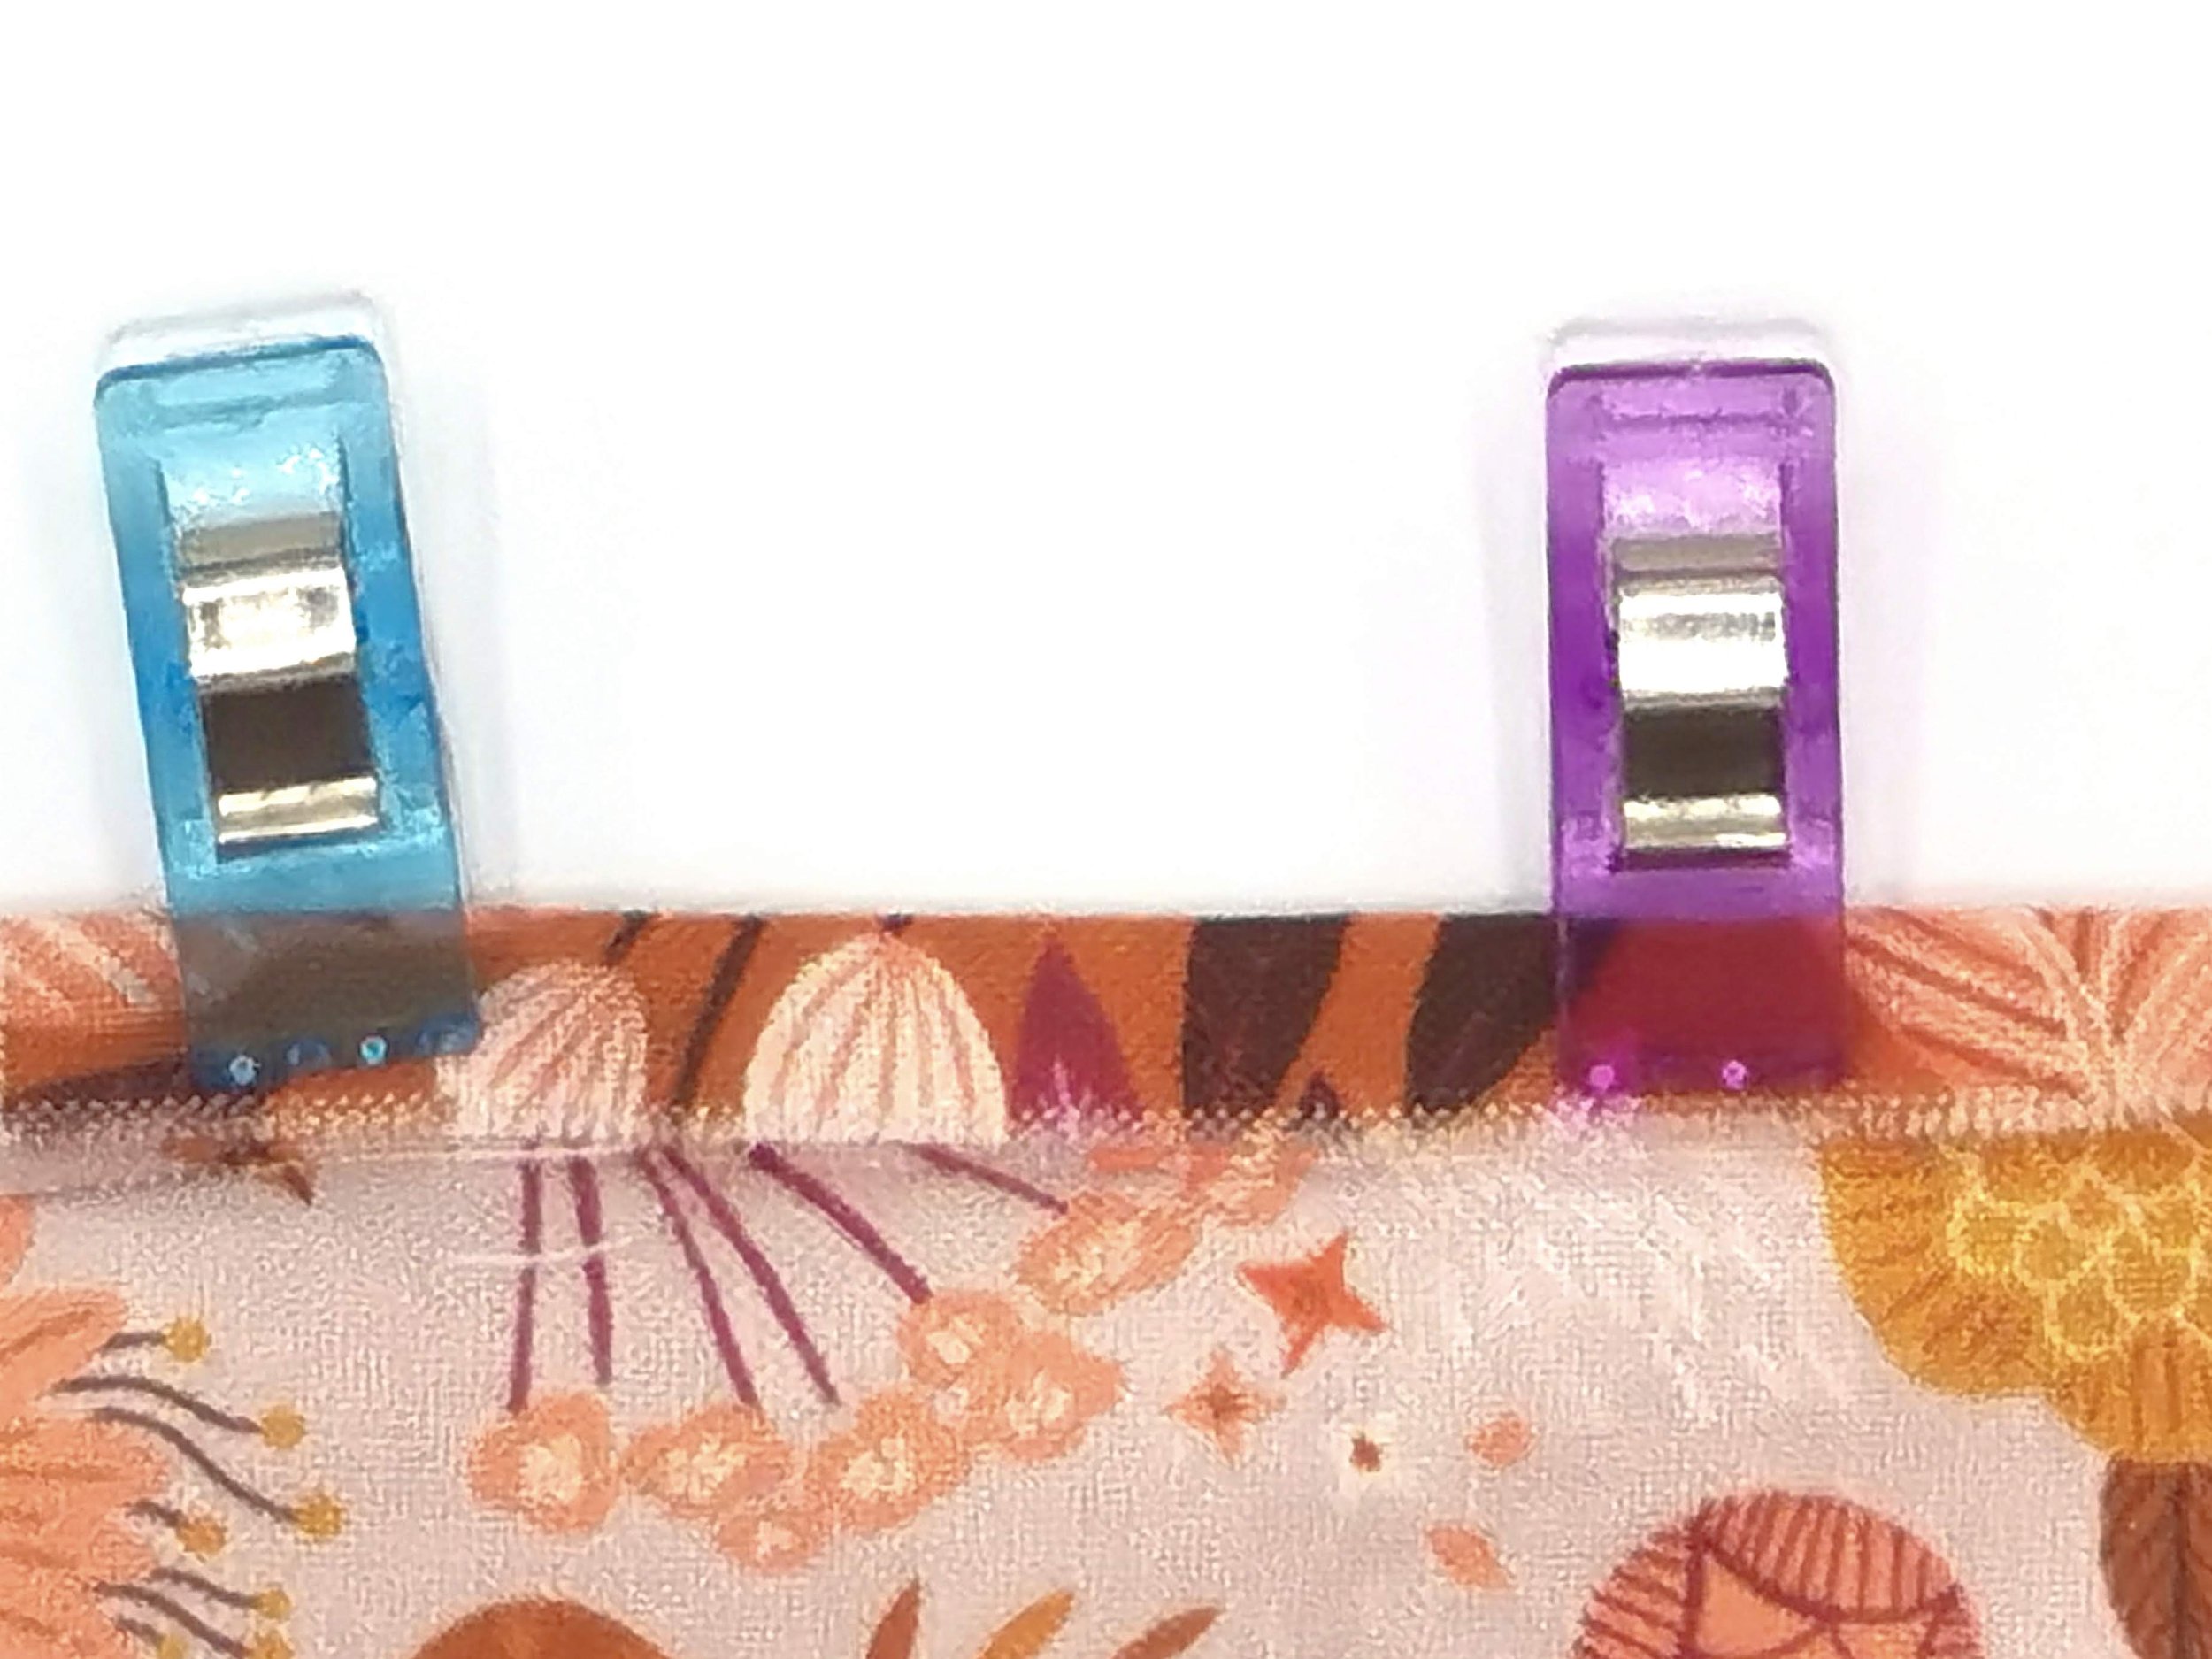
With right sides up, open out the folded hem of the back, and feed the hem of the front over it, making sure that both raw edges run along the folds. Use quilt clips to hold in place, leaving pin-sized gaps in between the clips.

Step 3
Spread your piece out flat, with the right sides up, then flip your clipped edge forwards, enclosing both raw edges. Pin along the seam, in the gaps left between the clips. You can slide a quilting ruler or similar under the seam to make this easier. Remove the clips.
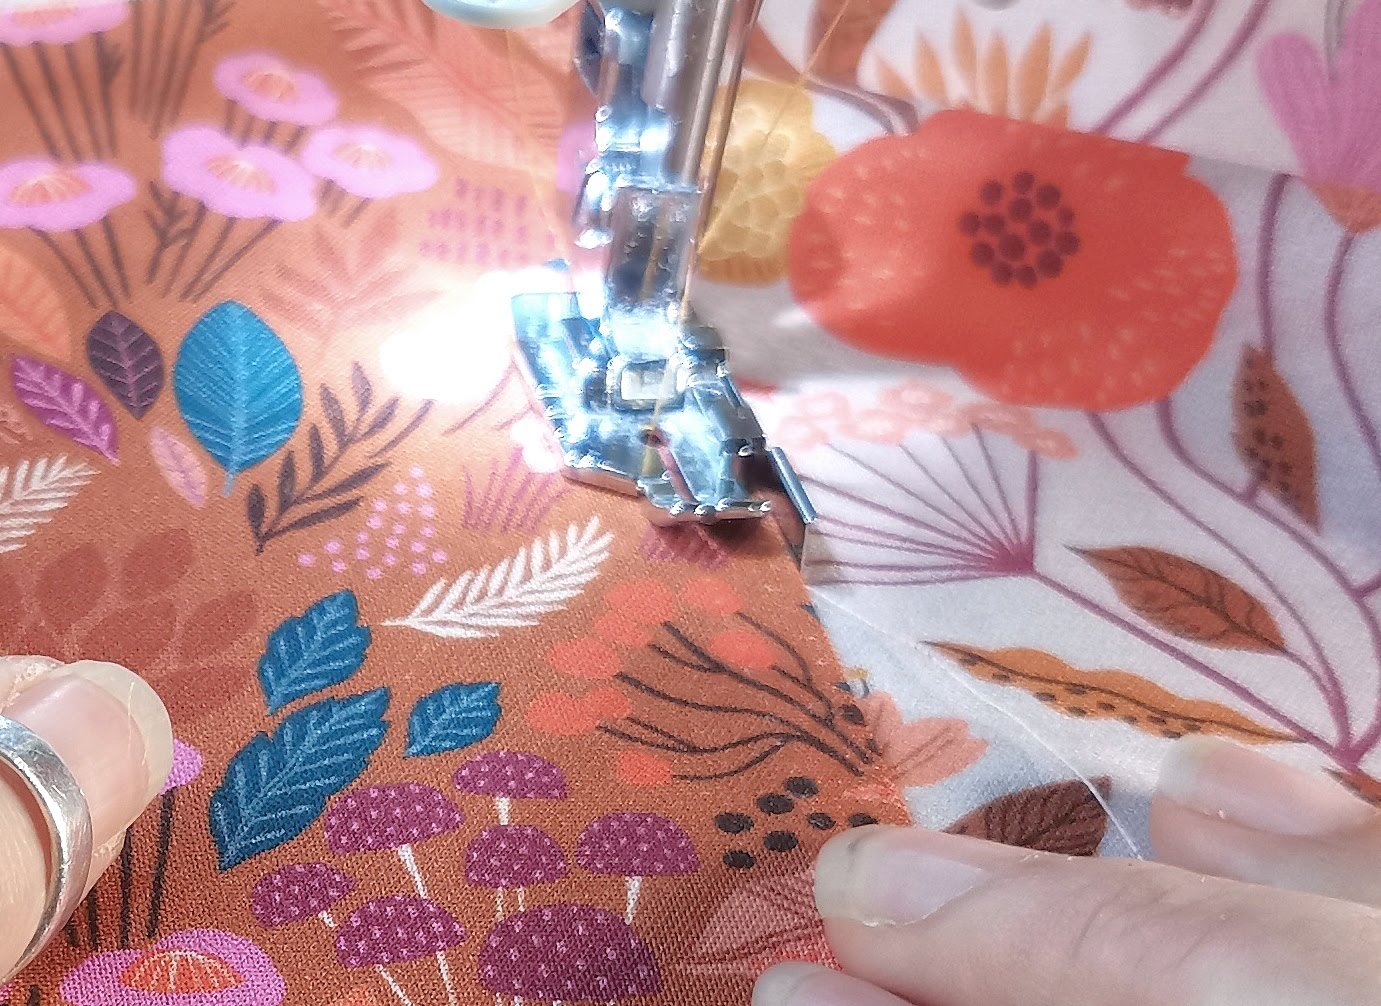
Step 4
If you have a 1/4” foot for your machine, you can use it to get the perfect spacing. Start with the right side up, and with the side of your 1/4” foot running along the folded edge. Hold the seam taut as you stitch, to keep the edges in their place inside the folds. If you don’t have a 1/4” foot, edge-stitch along the fold instead, at around 1/16” in.

Step 5
Now you can flip your piece over and add the second row of stitching! Repeat the above step but for the wrong side of the seam.
When you go to stitch the second side and the base of the bag, you will find it easier to stitch each seam by turning the bag through to work from the inside to stitch an outer seam, and from the outside to stitch an inner seam.

And you are done!
Now it is time to admire your beautiful strong seam, and especially your lovely stitching!
When calculating to add this kind of seam, allow 3/8”: 1/4” for each fold, and half of that for the centre of the seam. You can then decide if you want it facing forwards or backwards.