
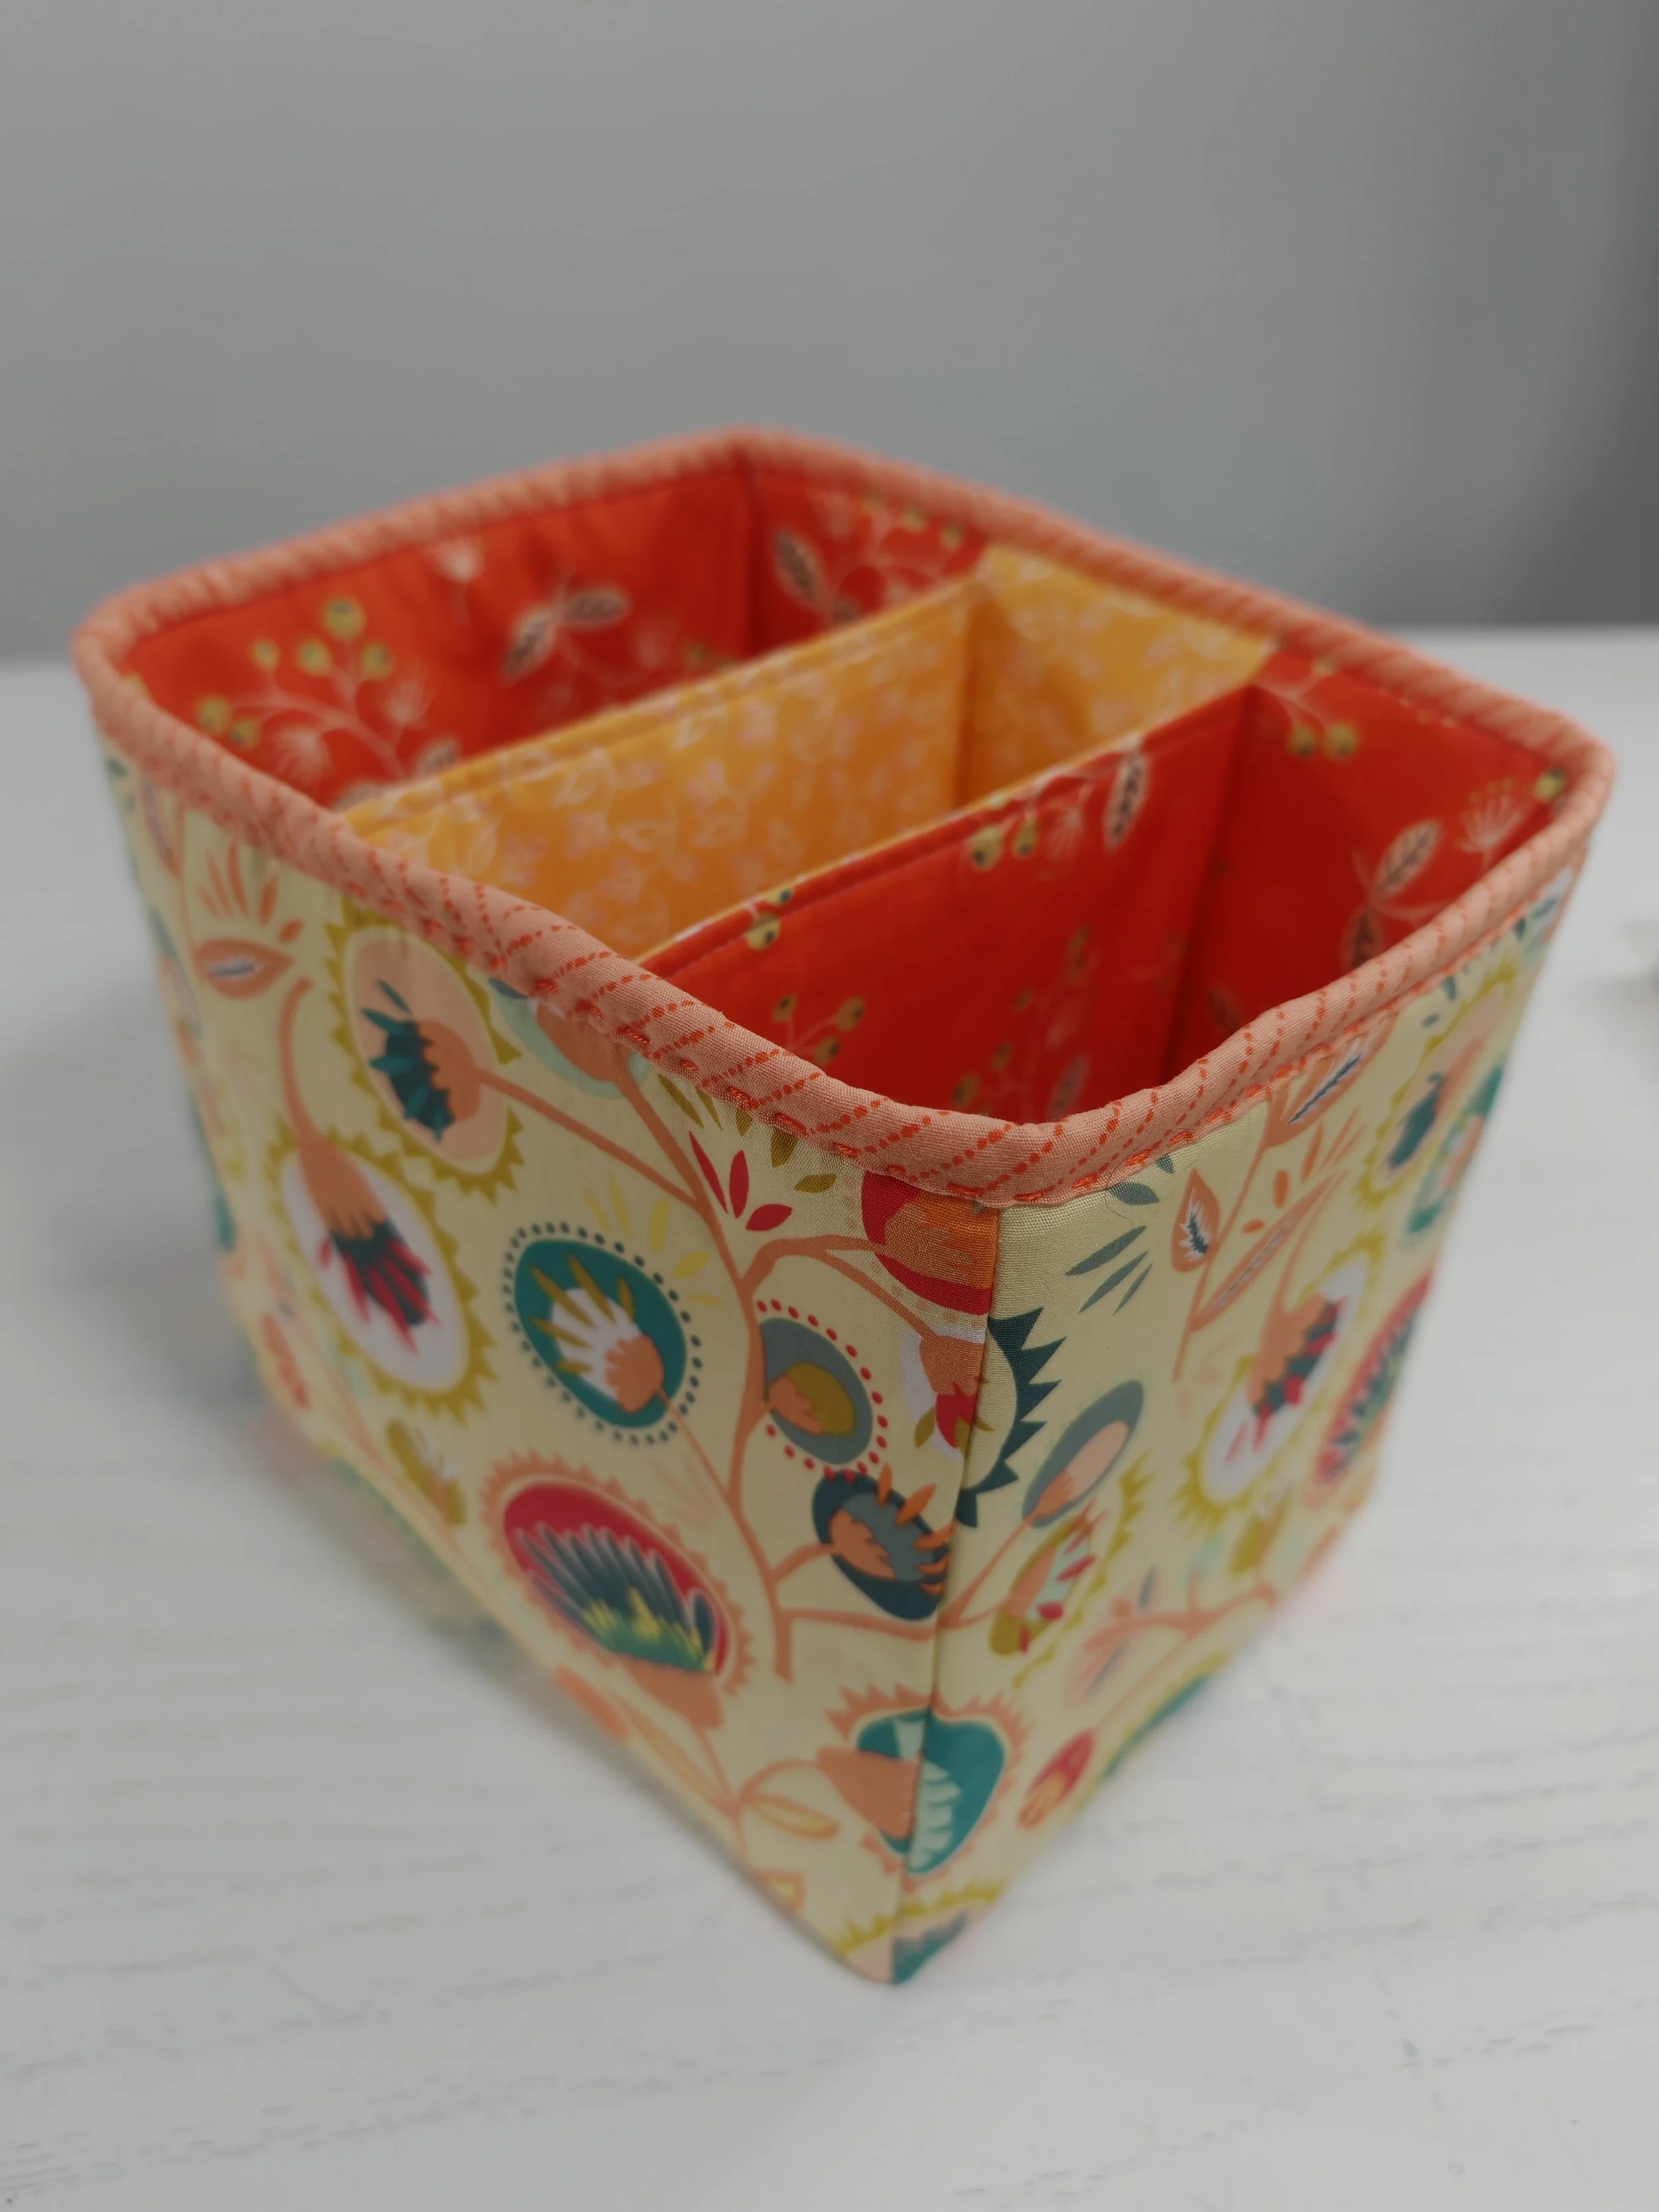
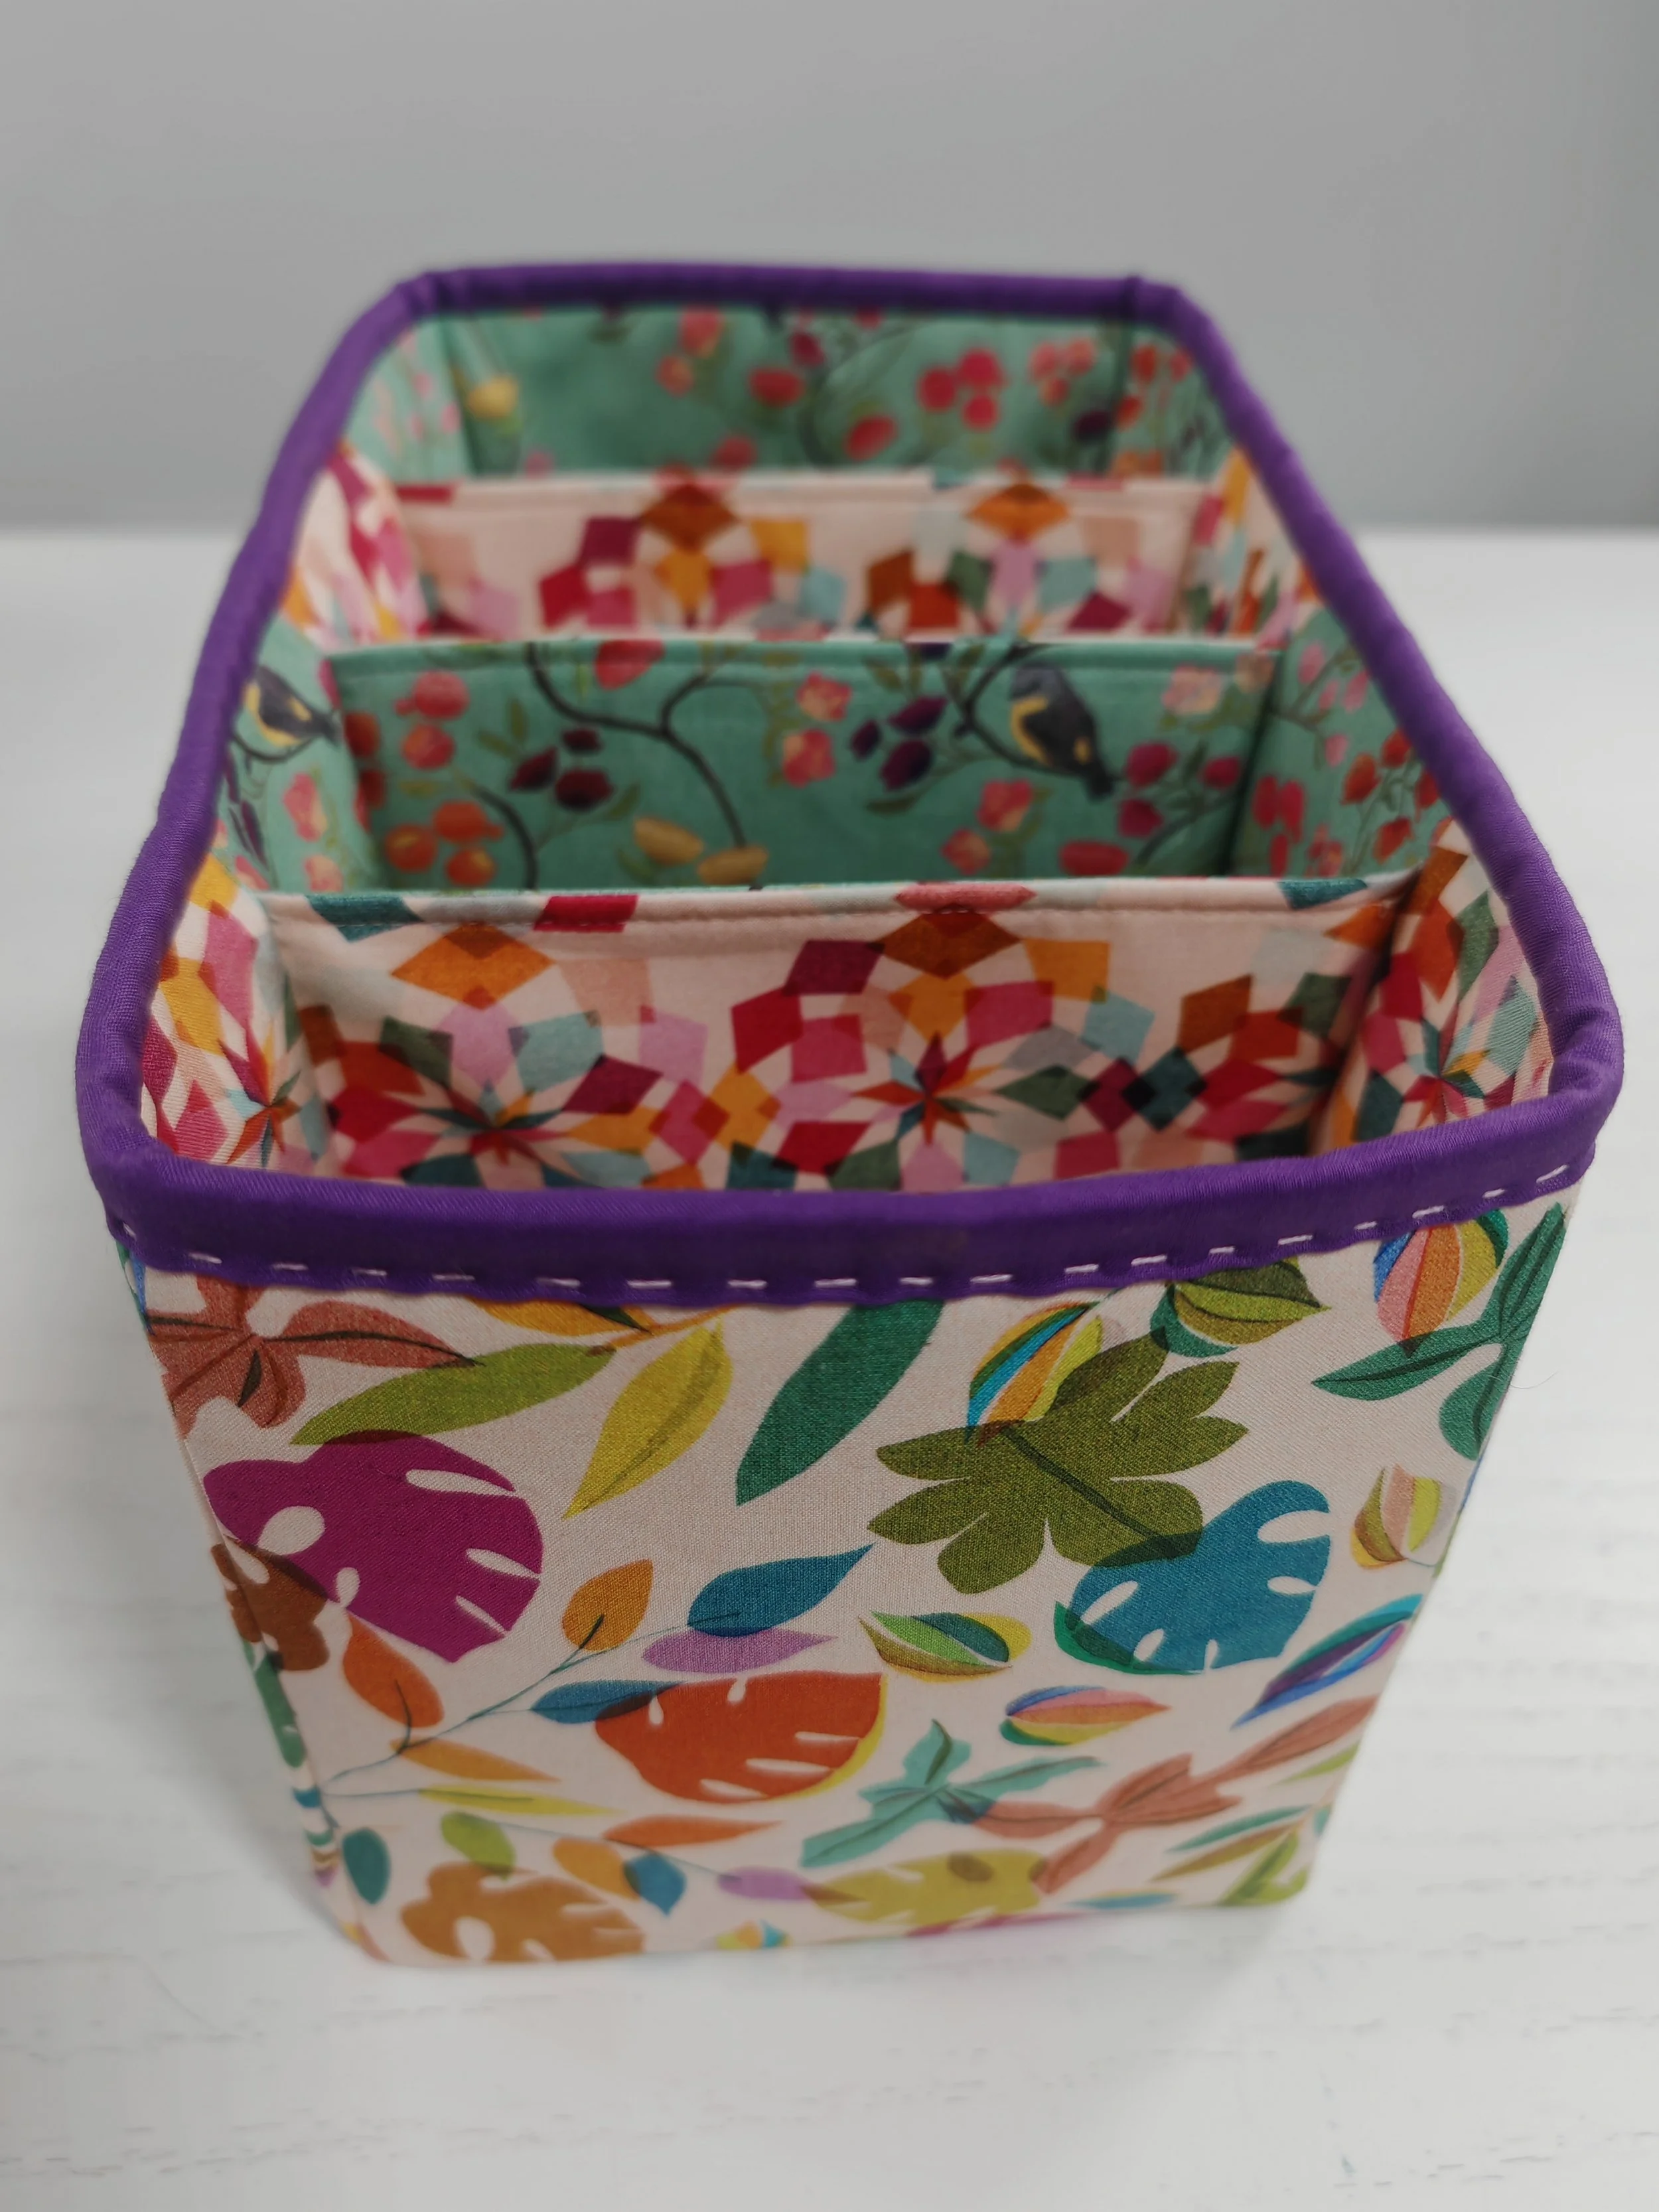
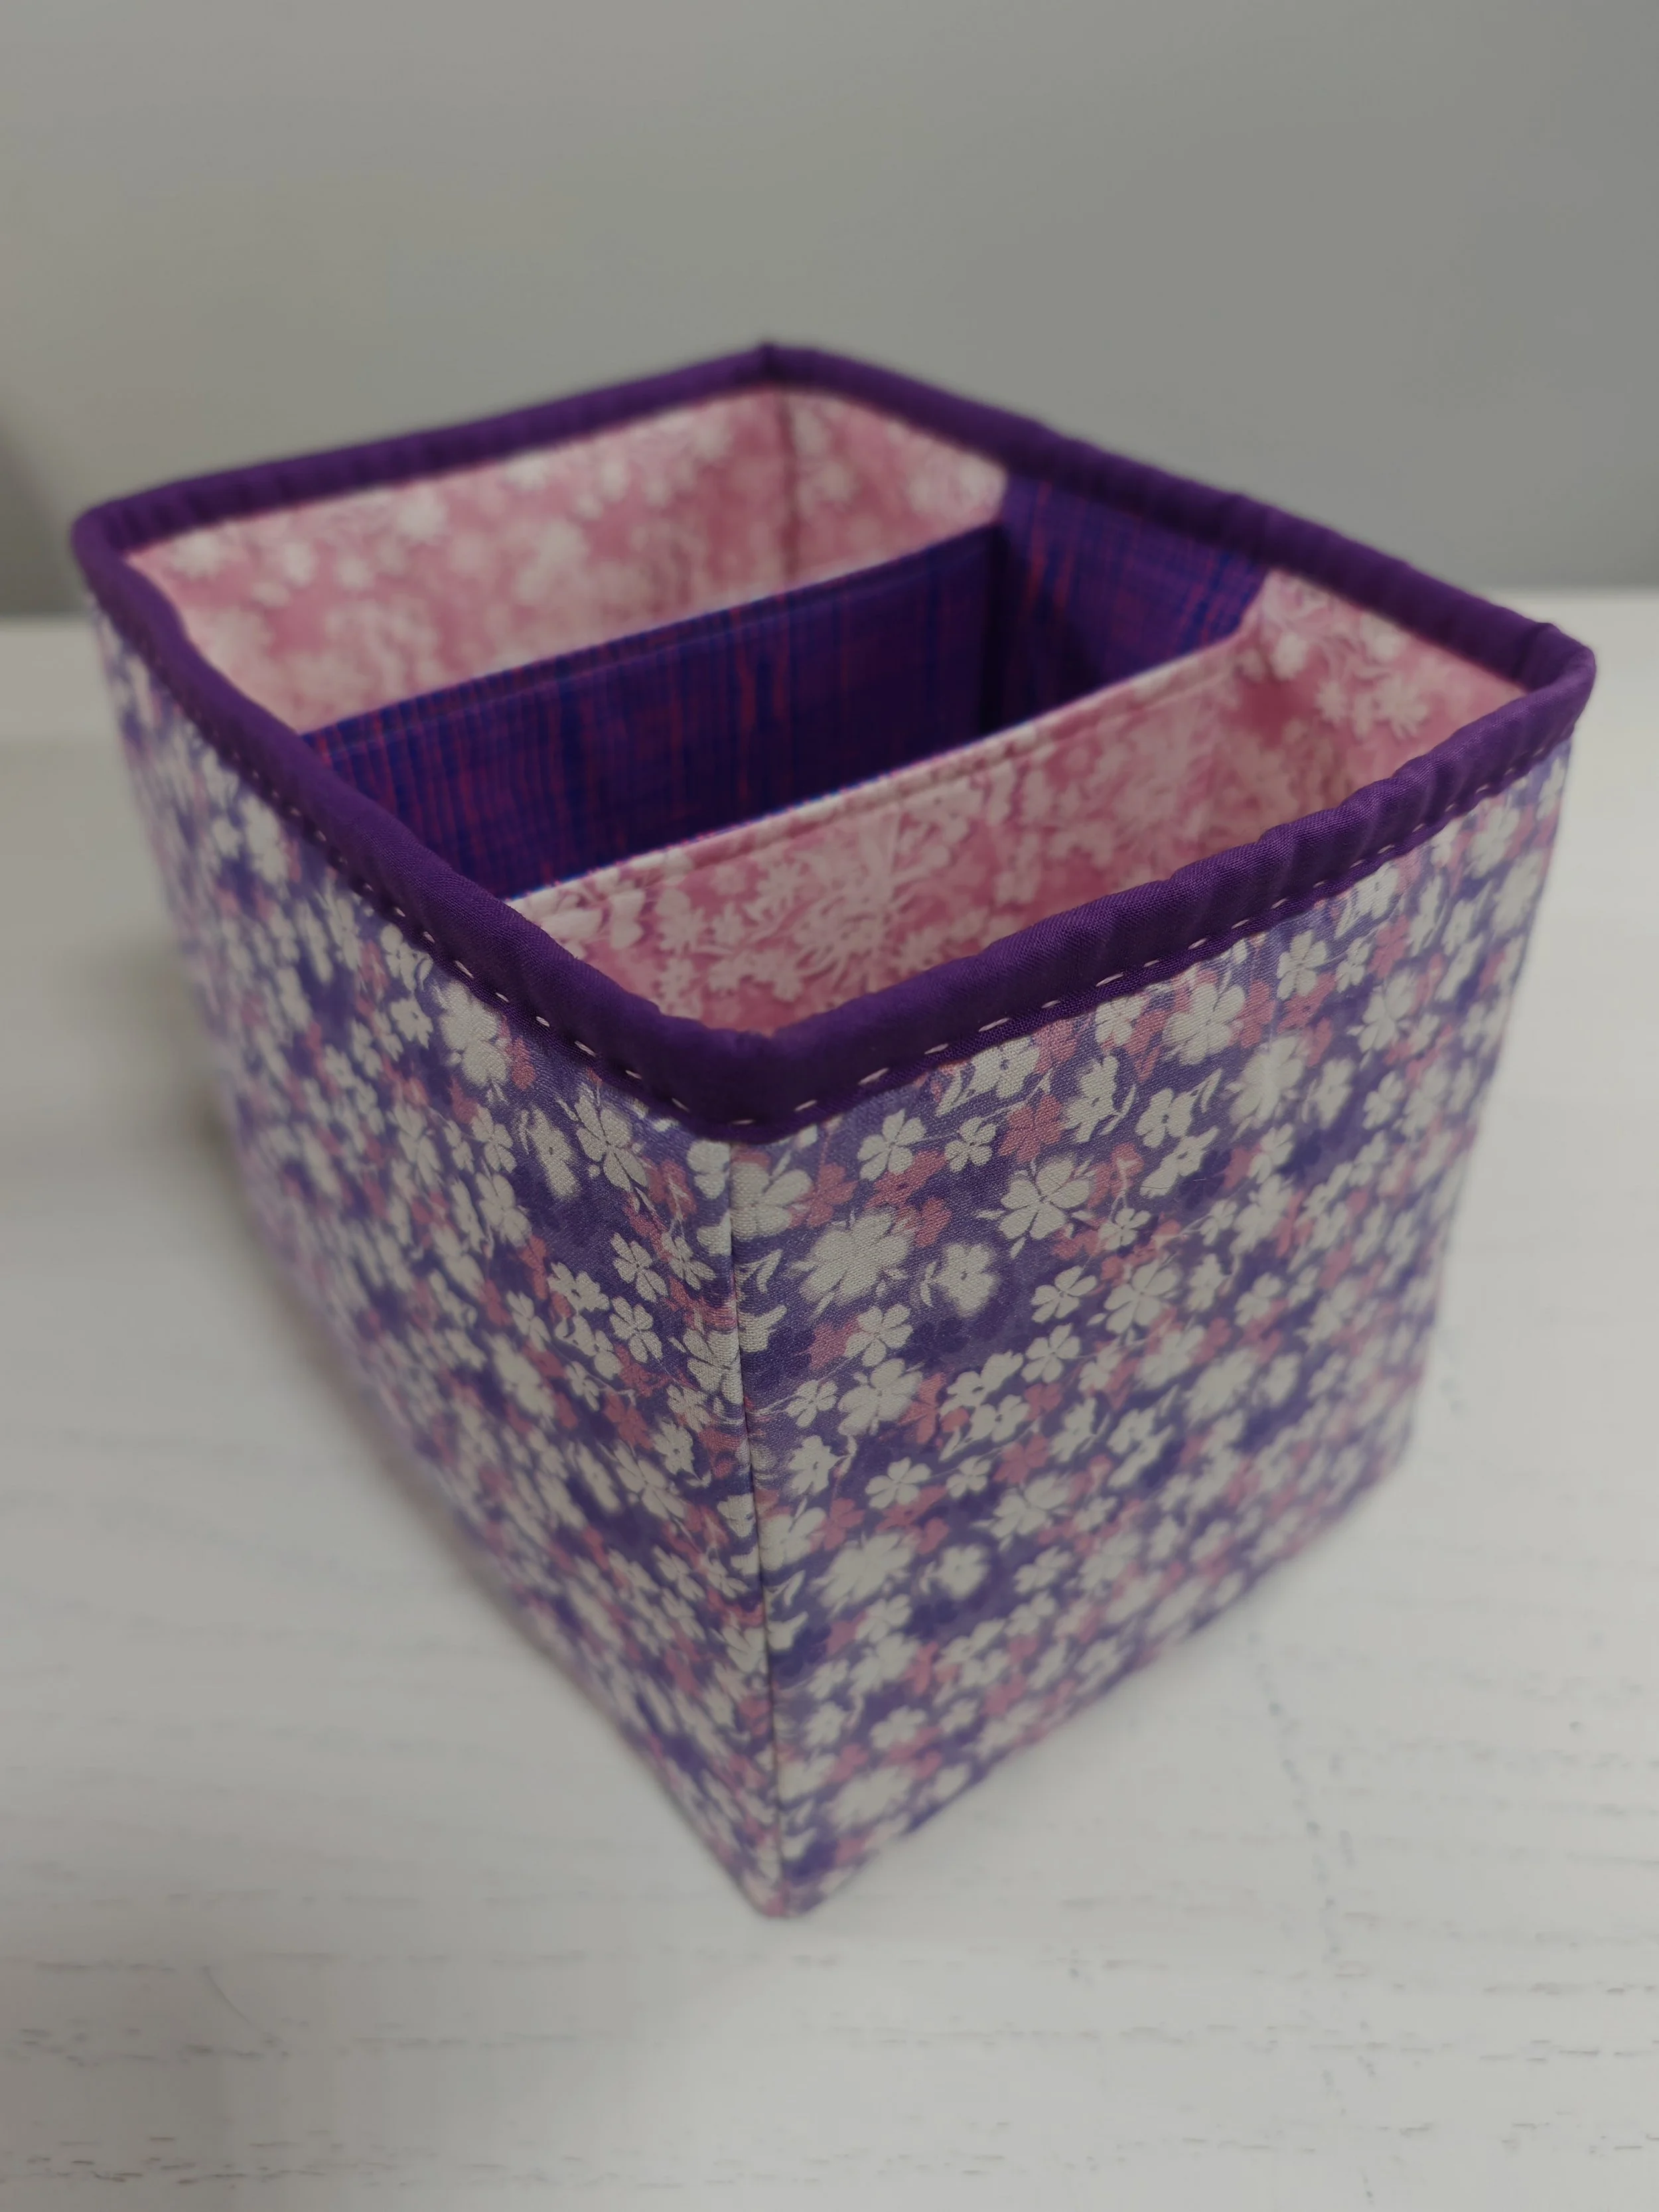
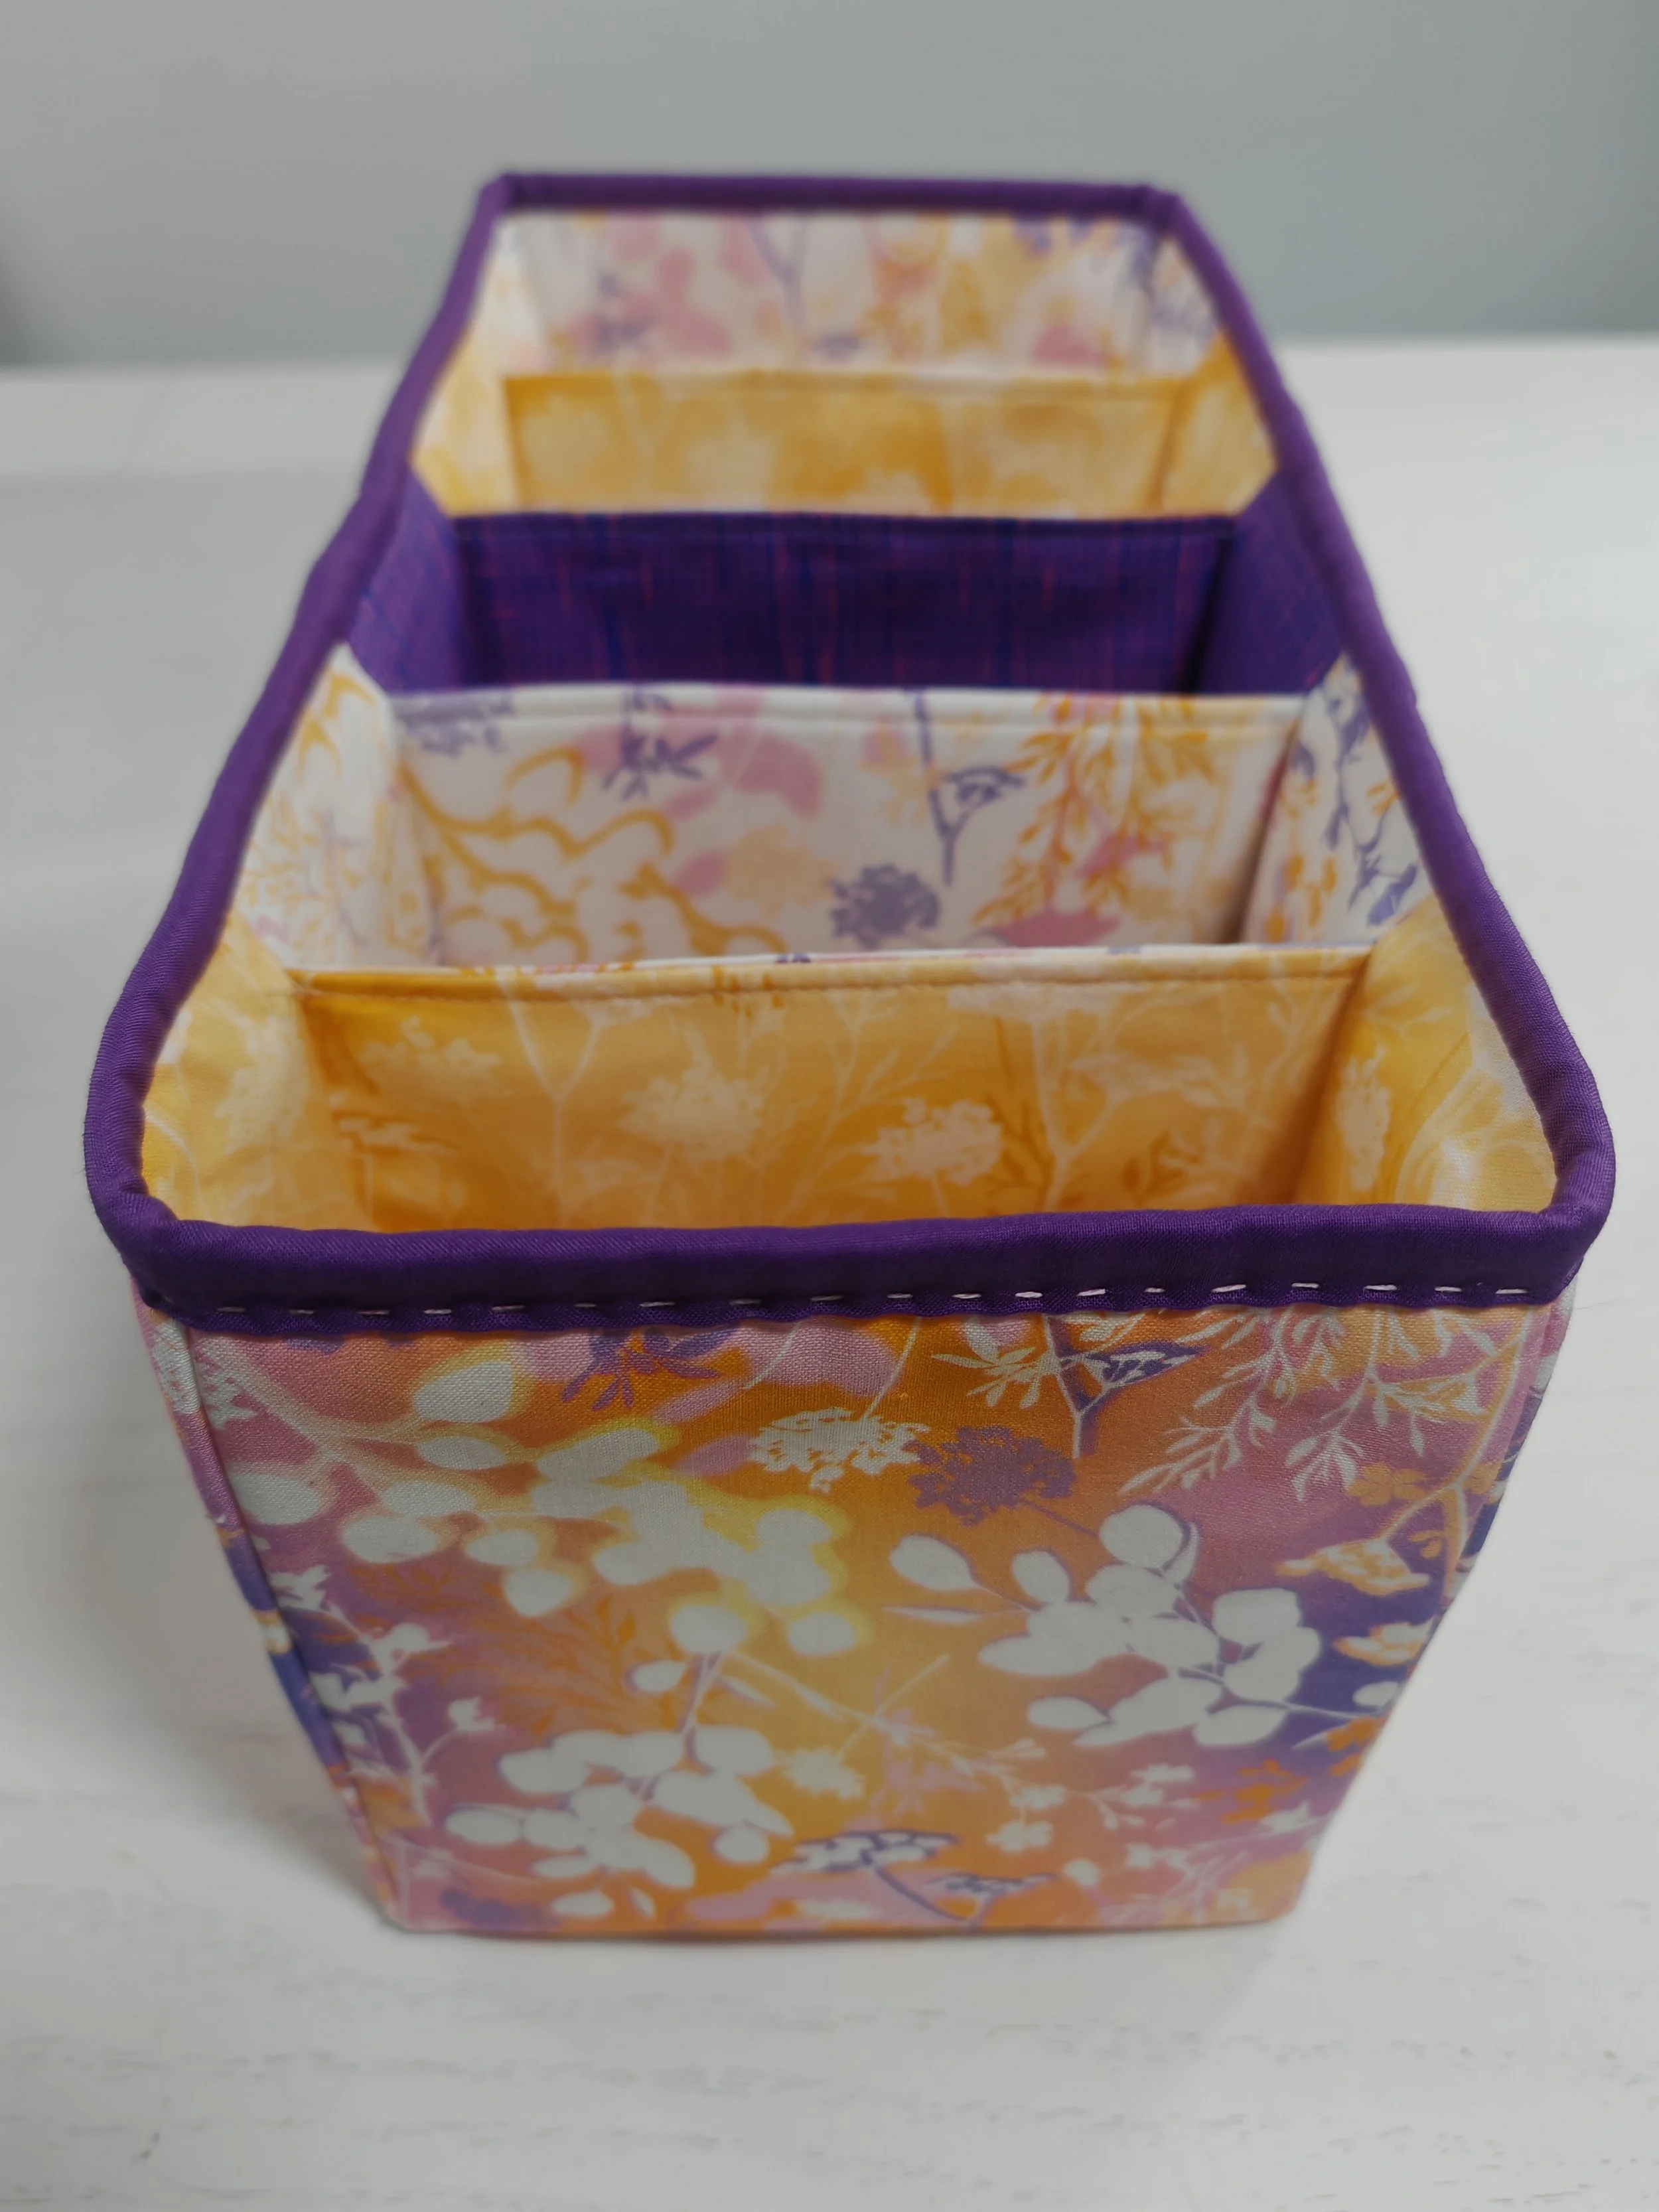
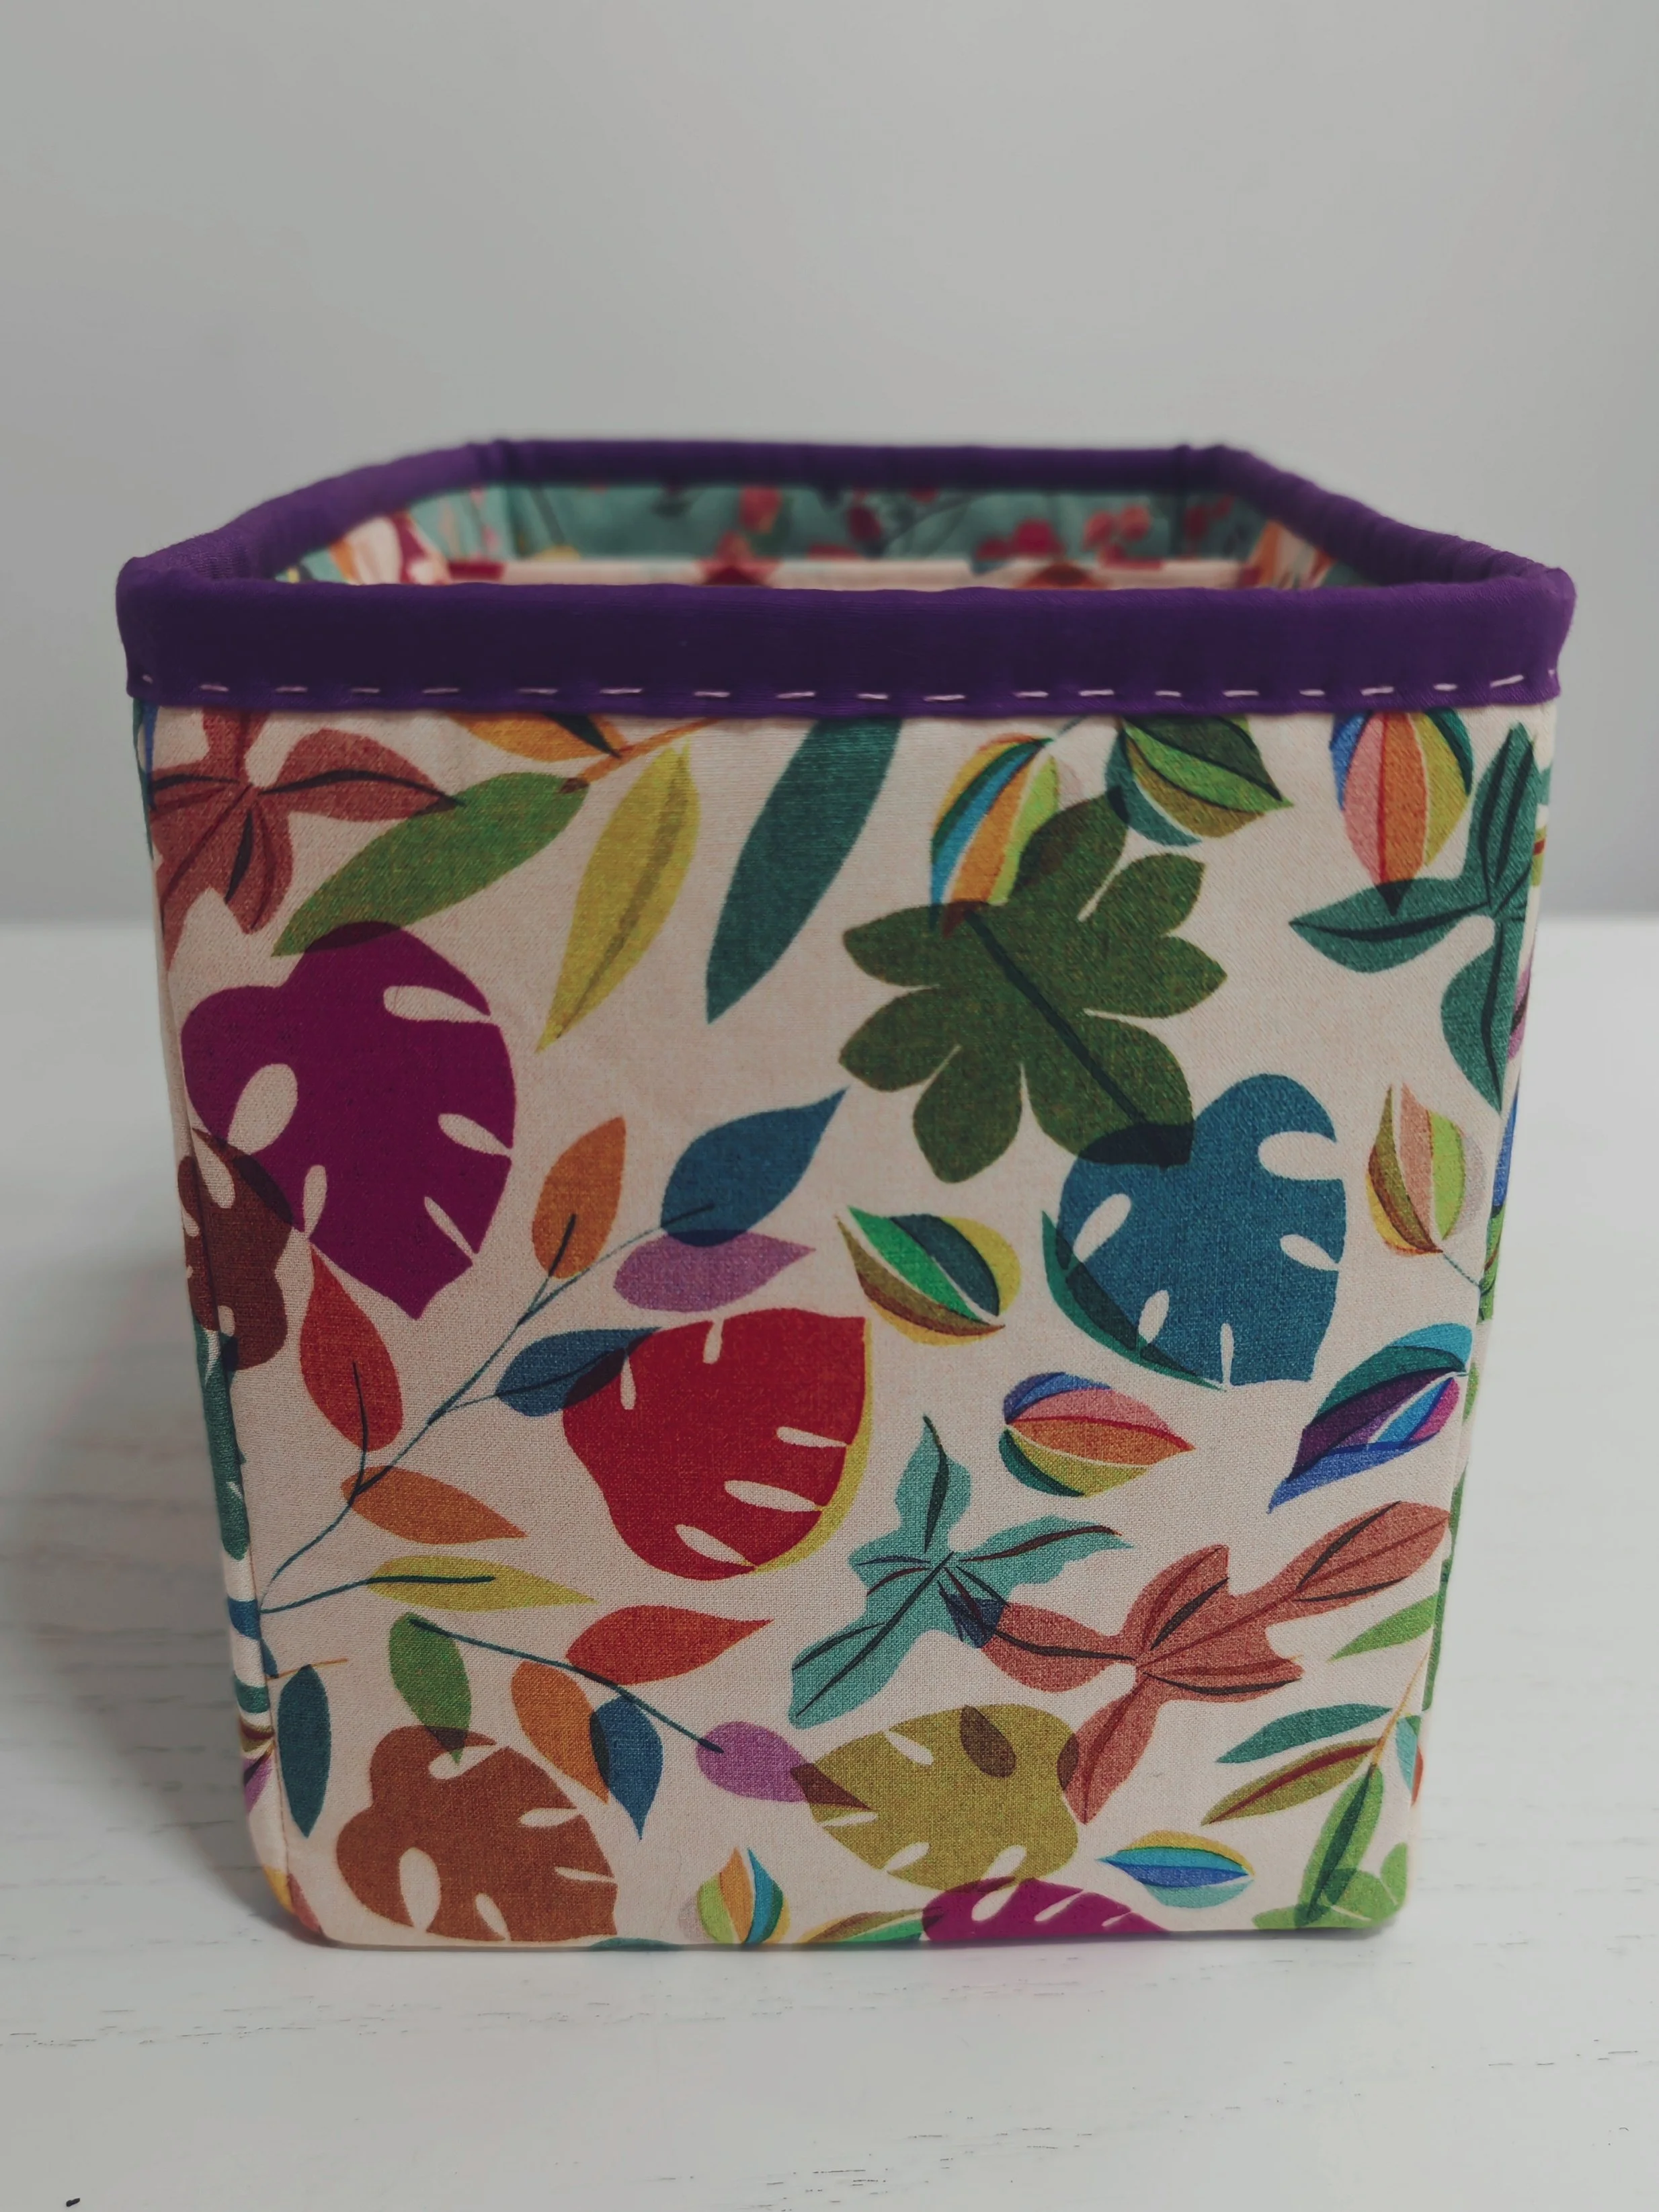
The Versatile Storage Caddy - £6+VAT
If you want to organise your life, make yourself a Versatile Storage Caddy!
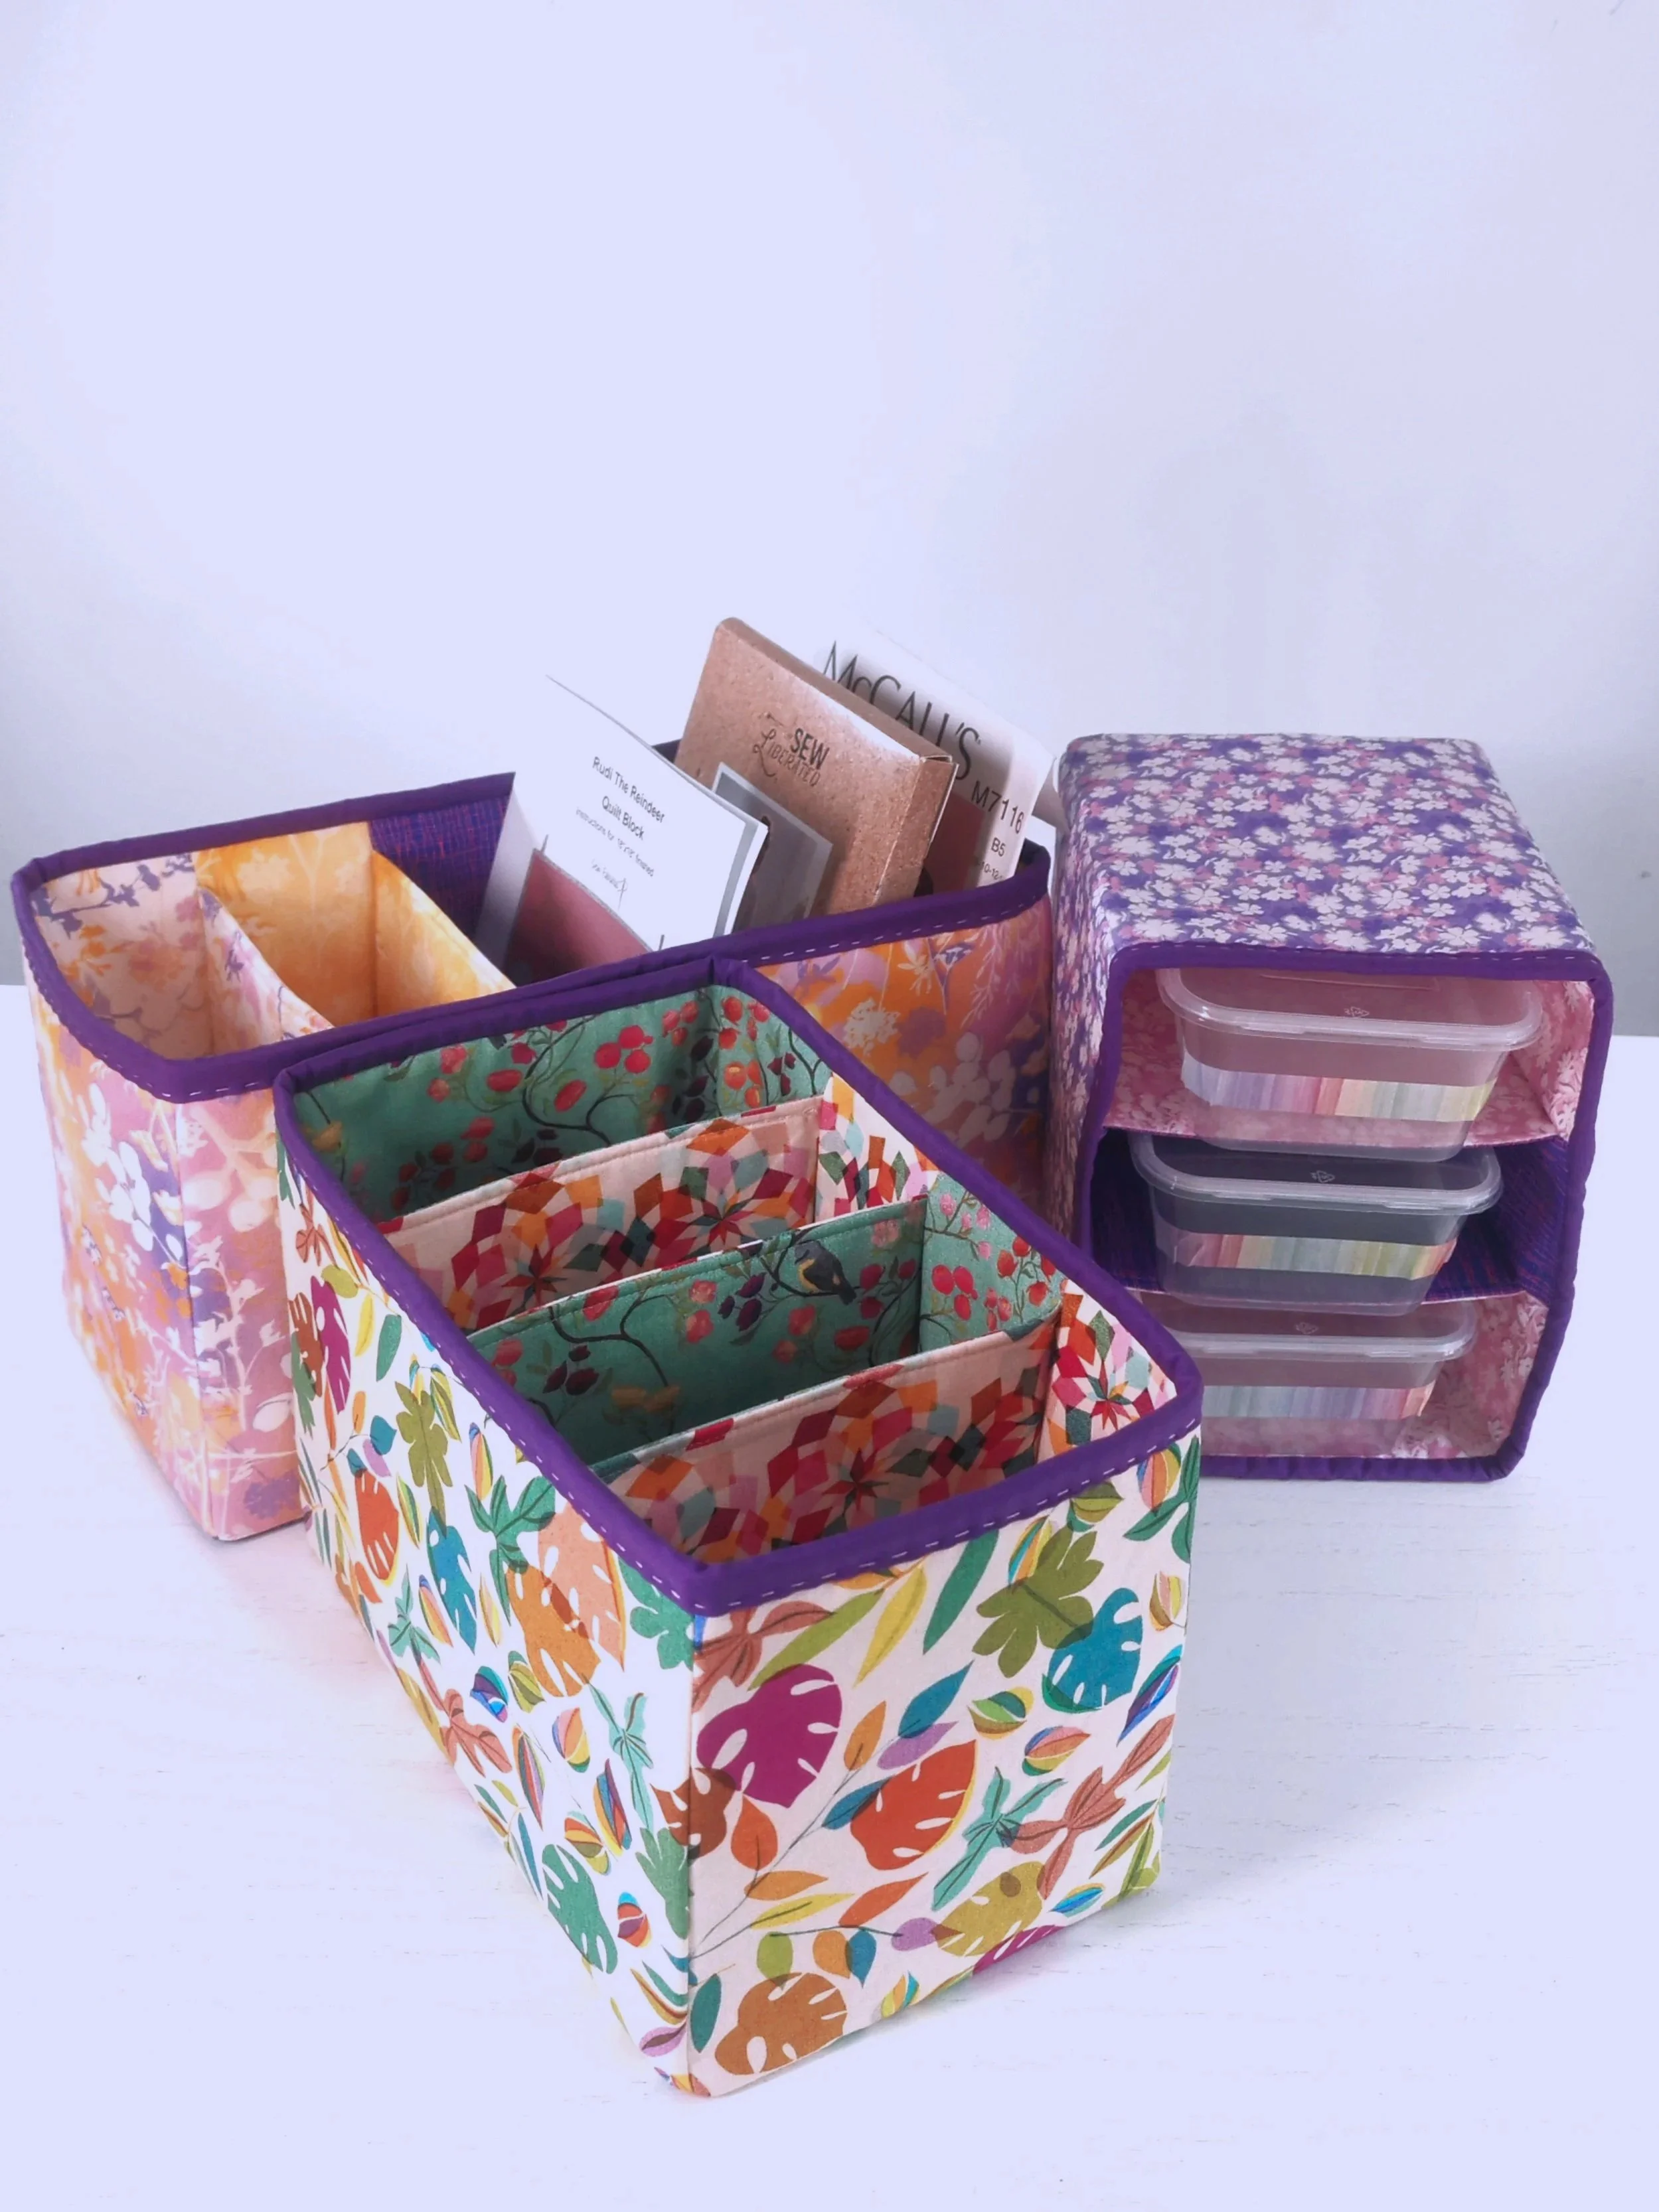
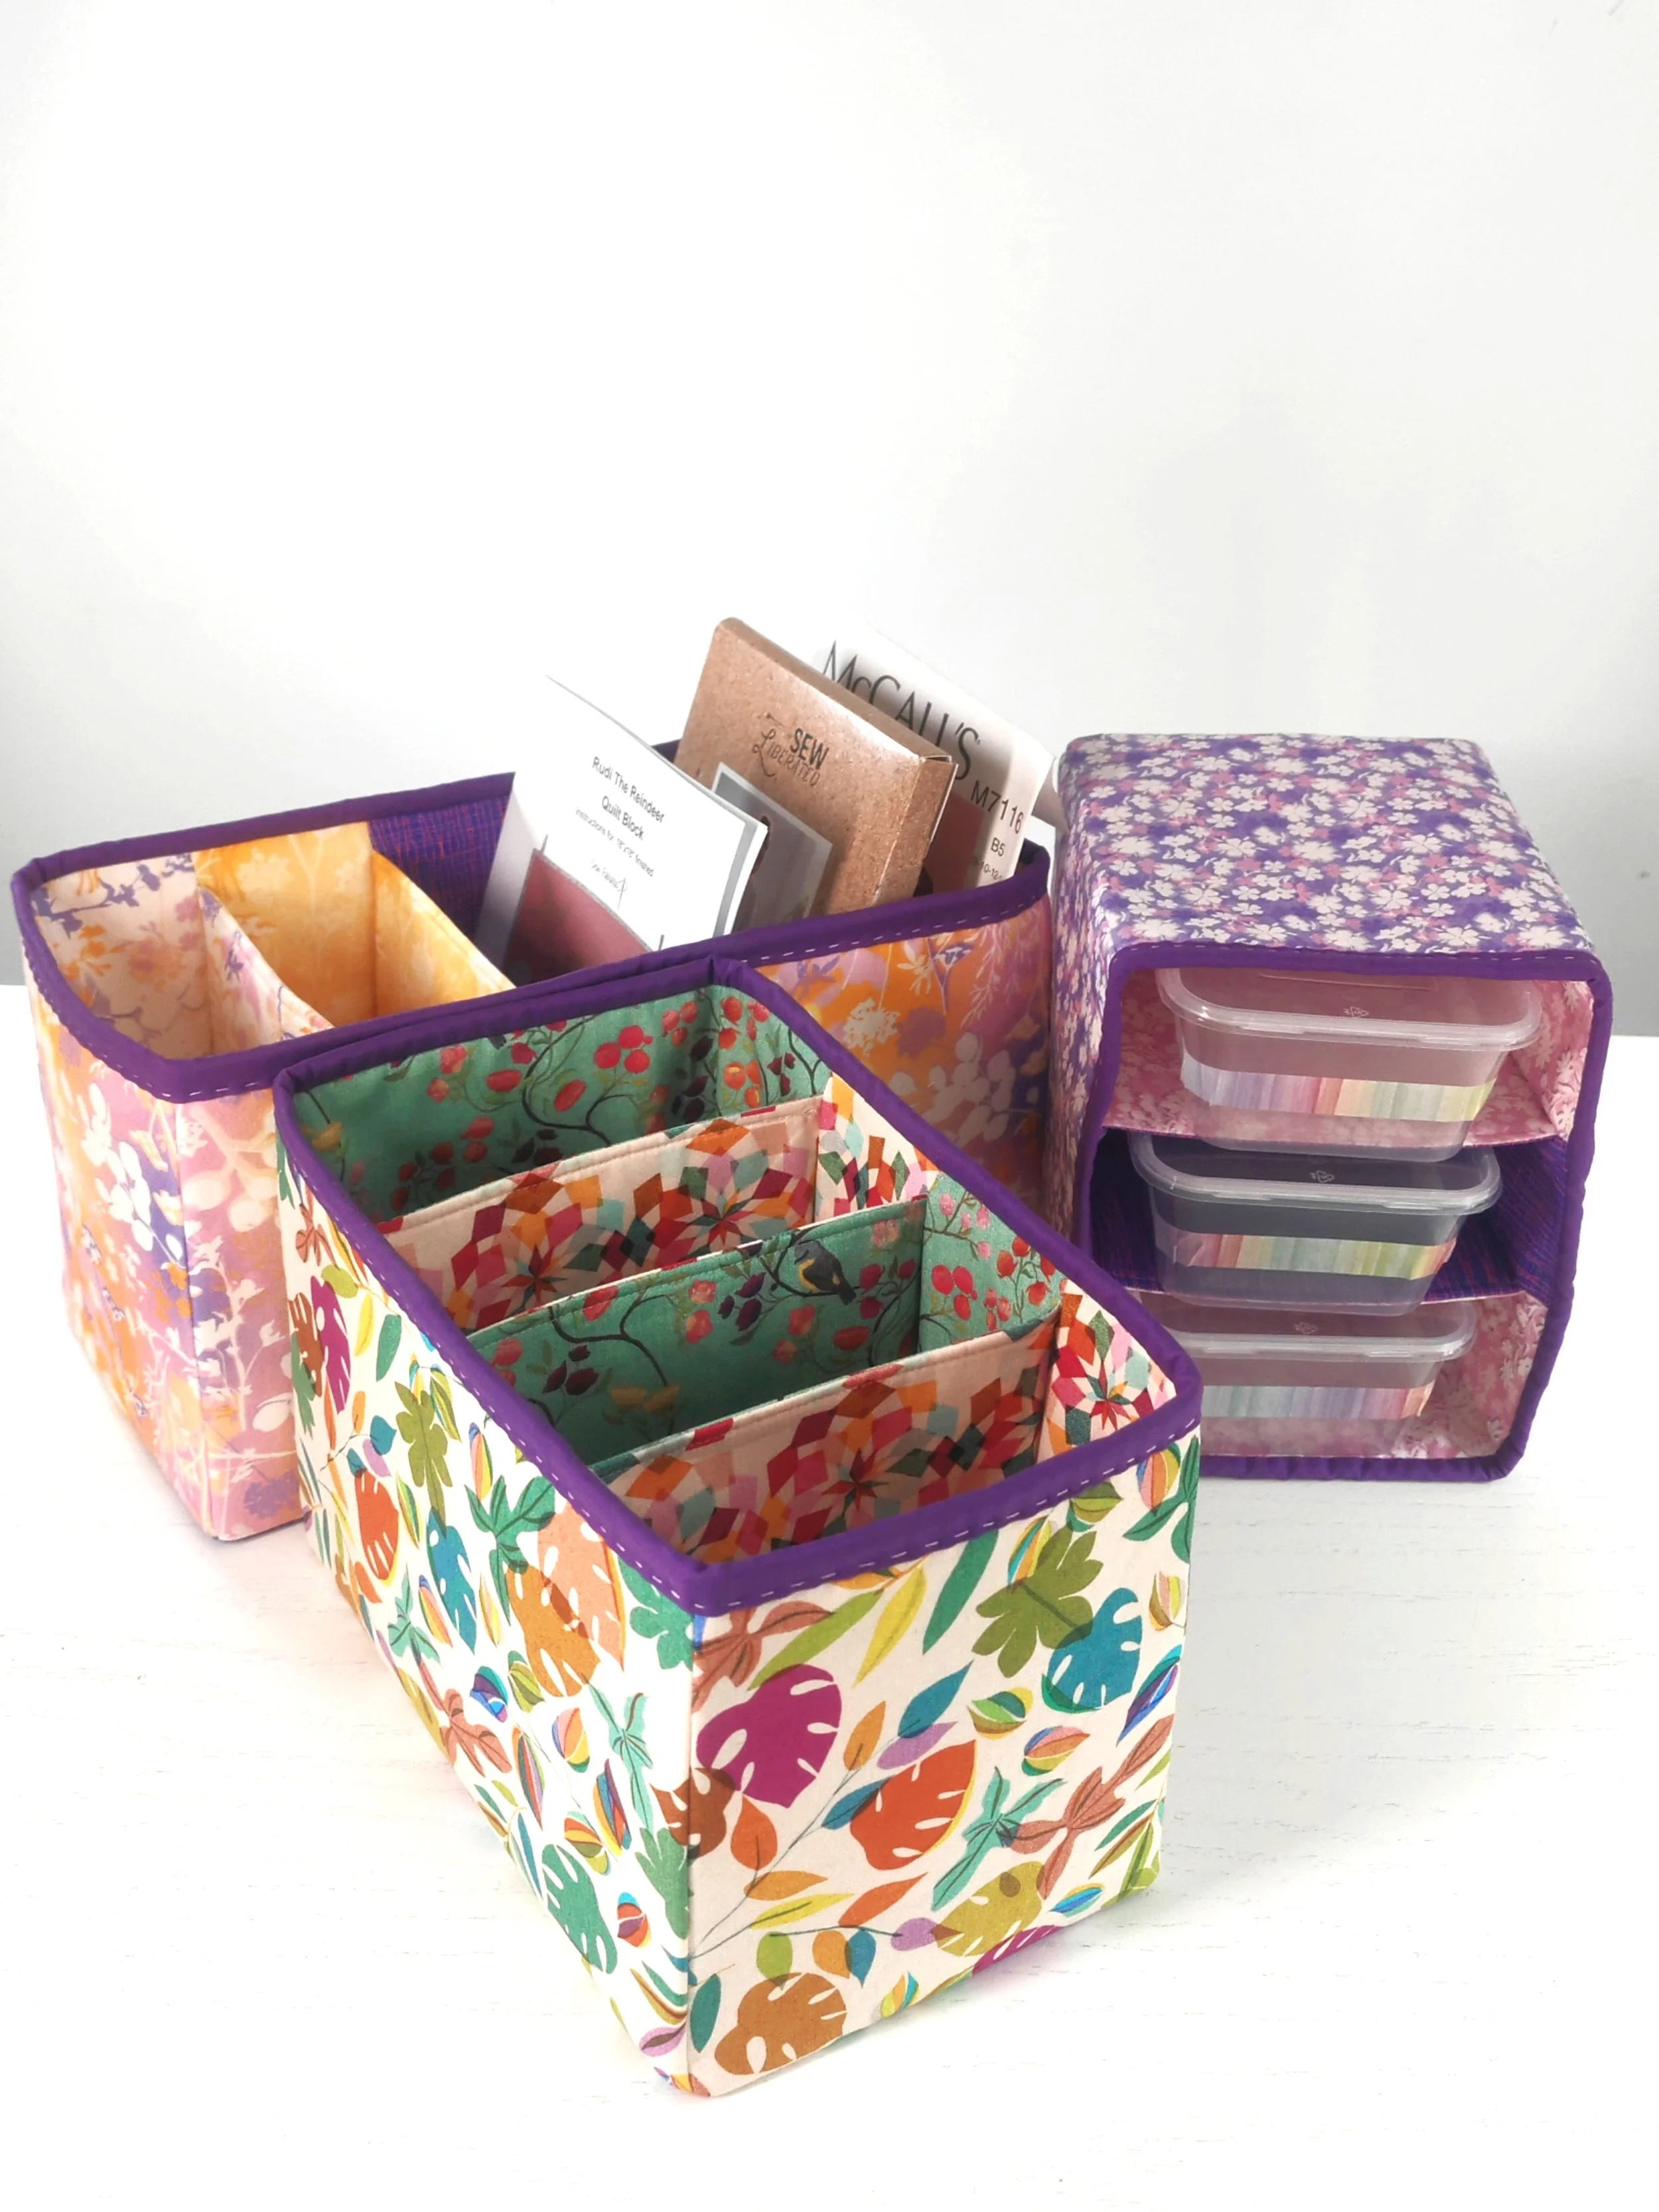
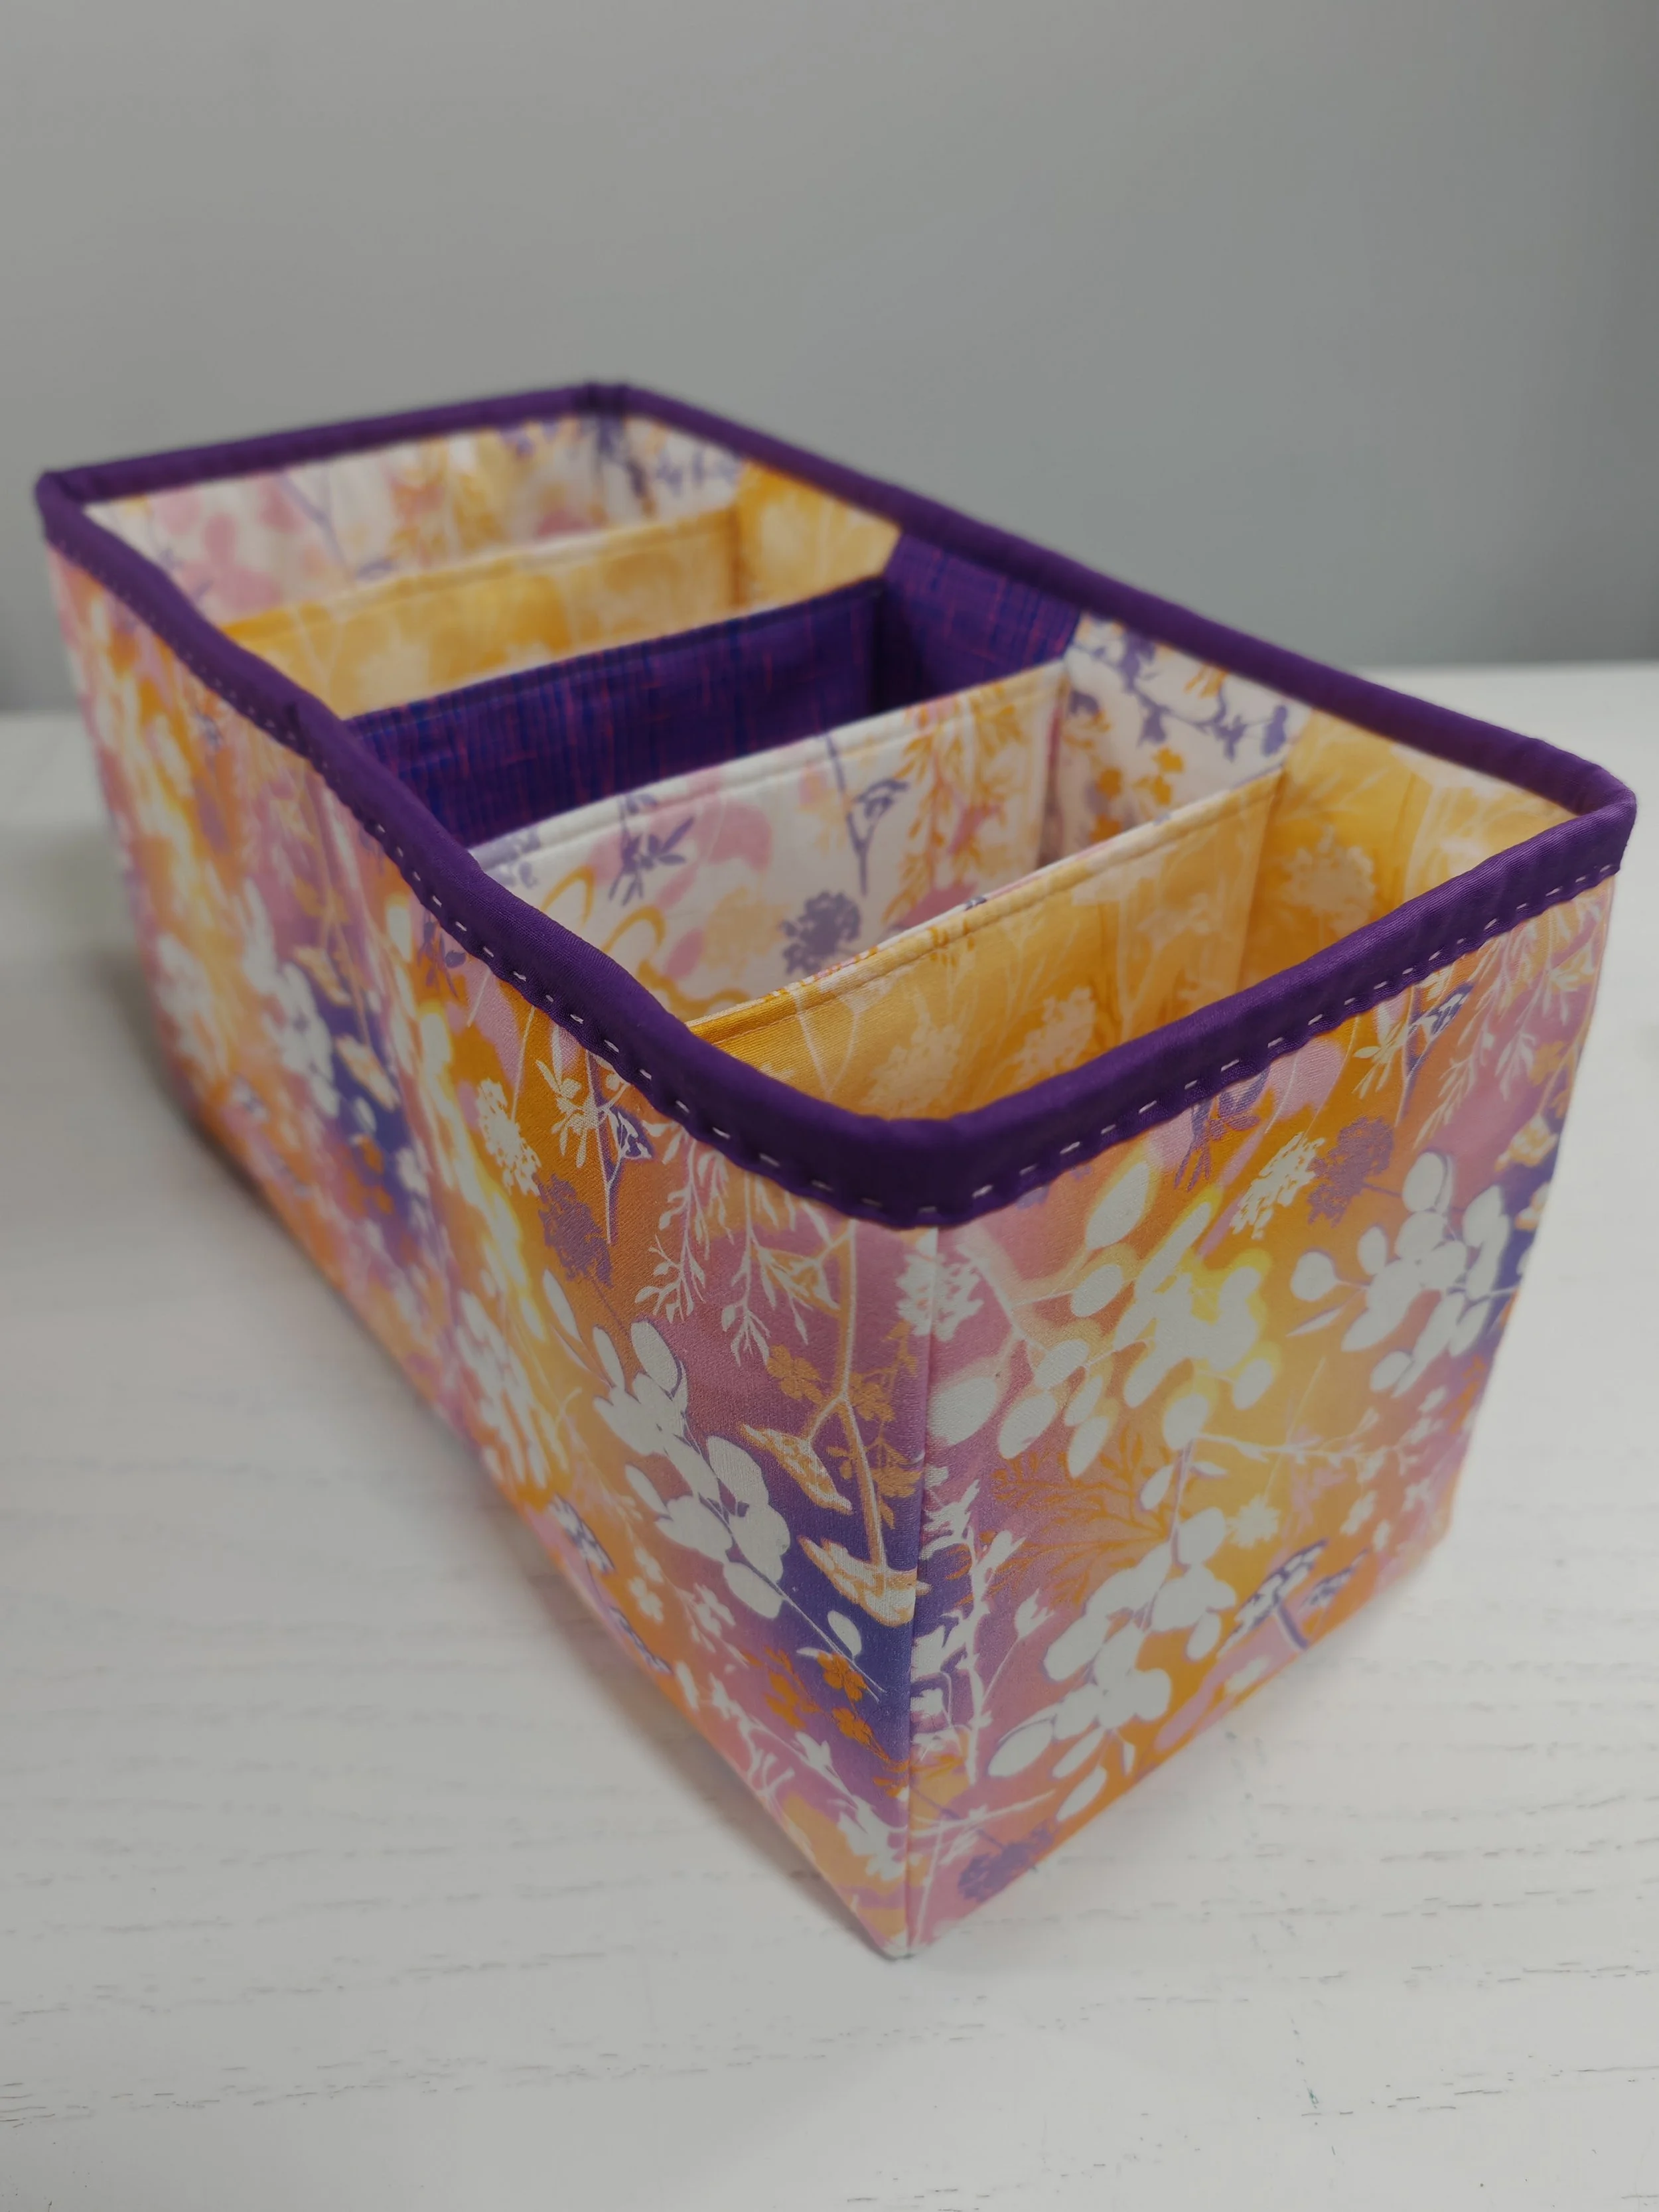
This design for this storage caddy was inspired by the need to make the best use of space in a deep drawer, but then it became so much more. Desktop storage or drawer organiser, this caddy is definitely versatile!
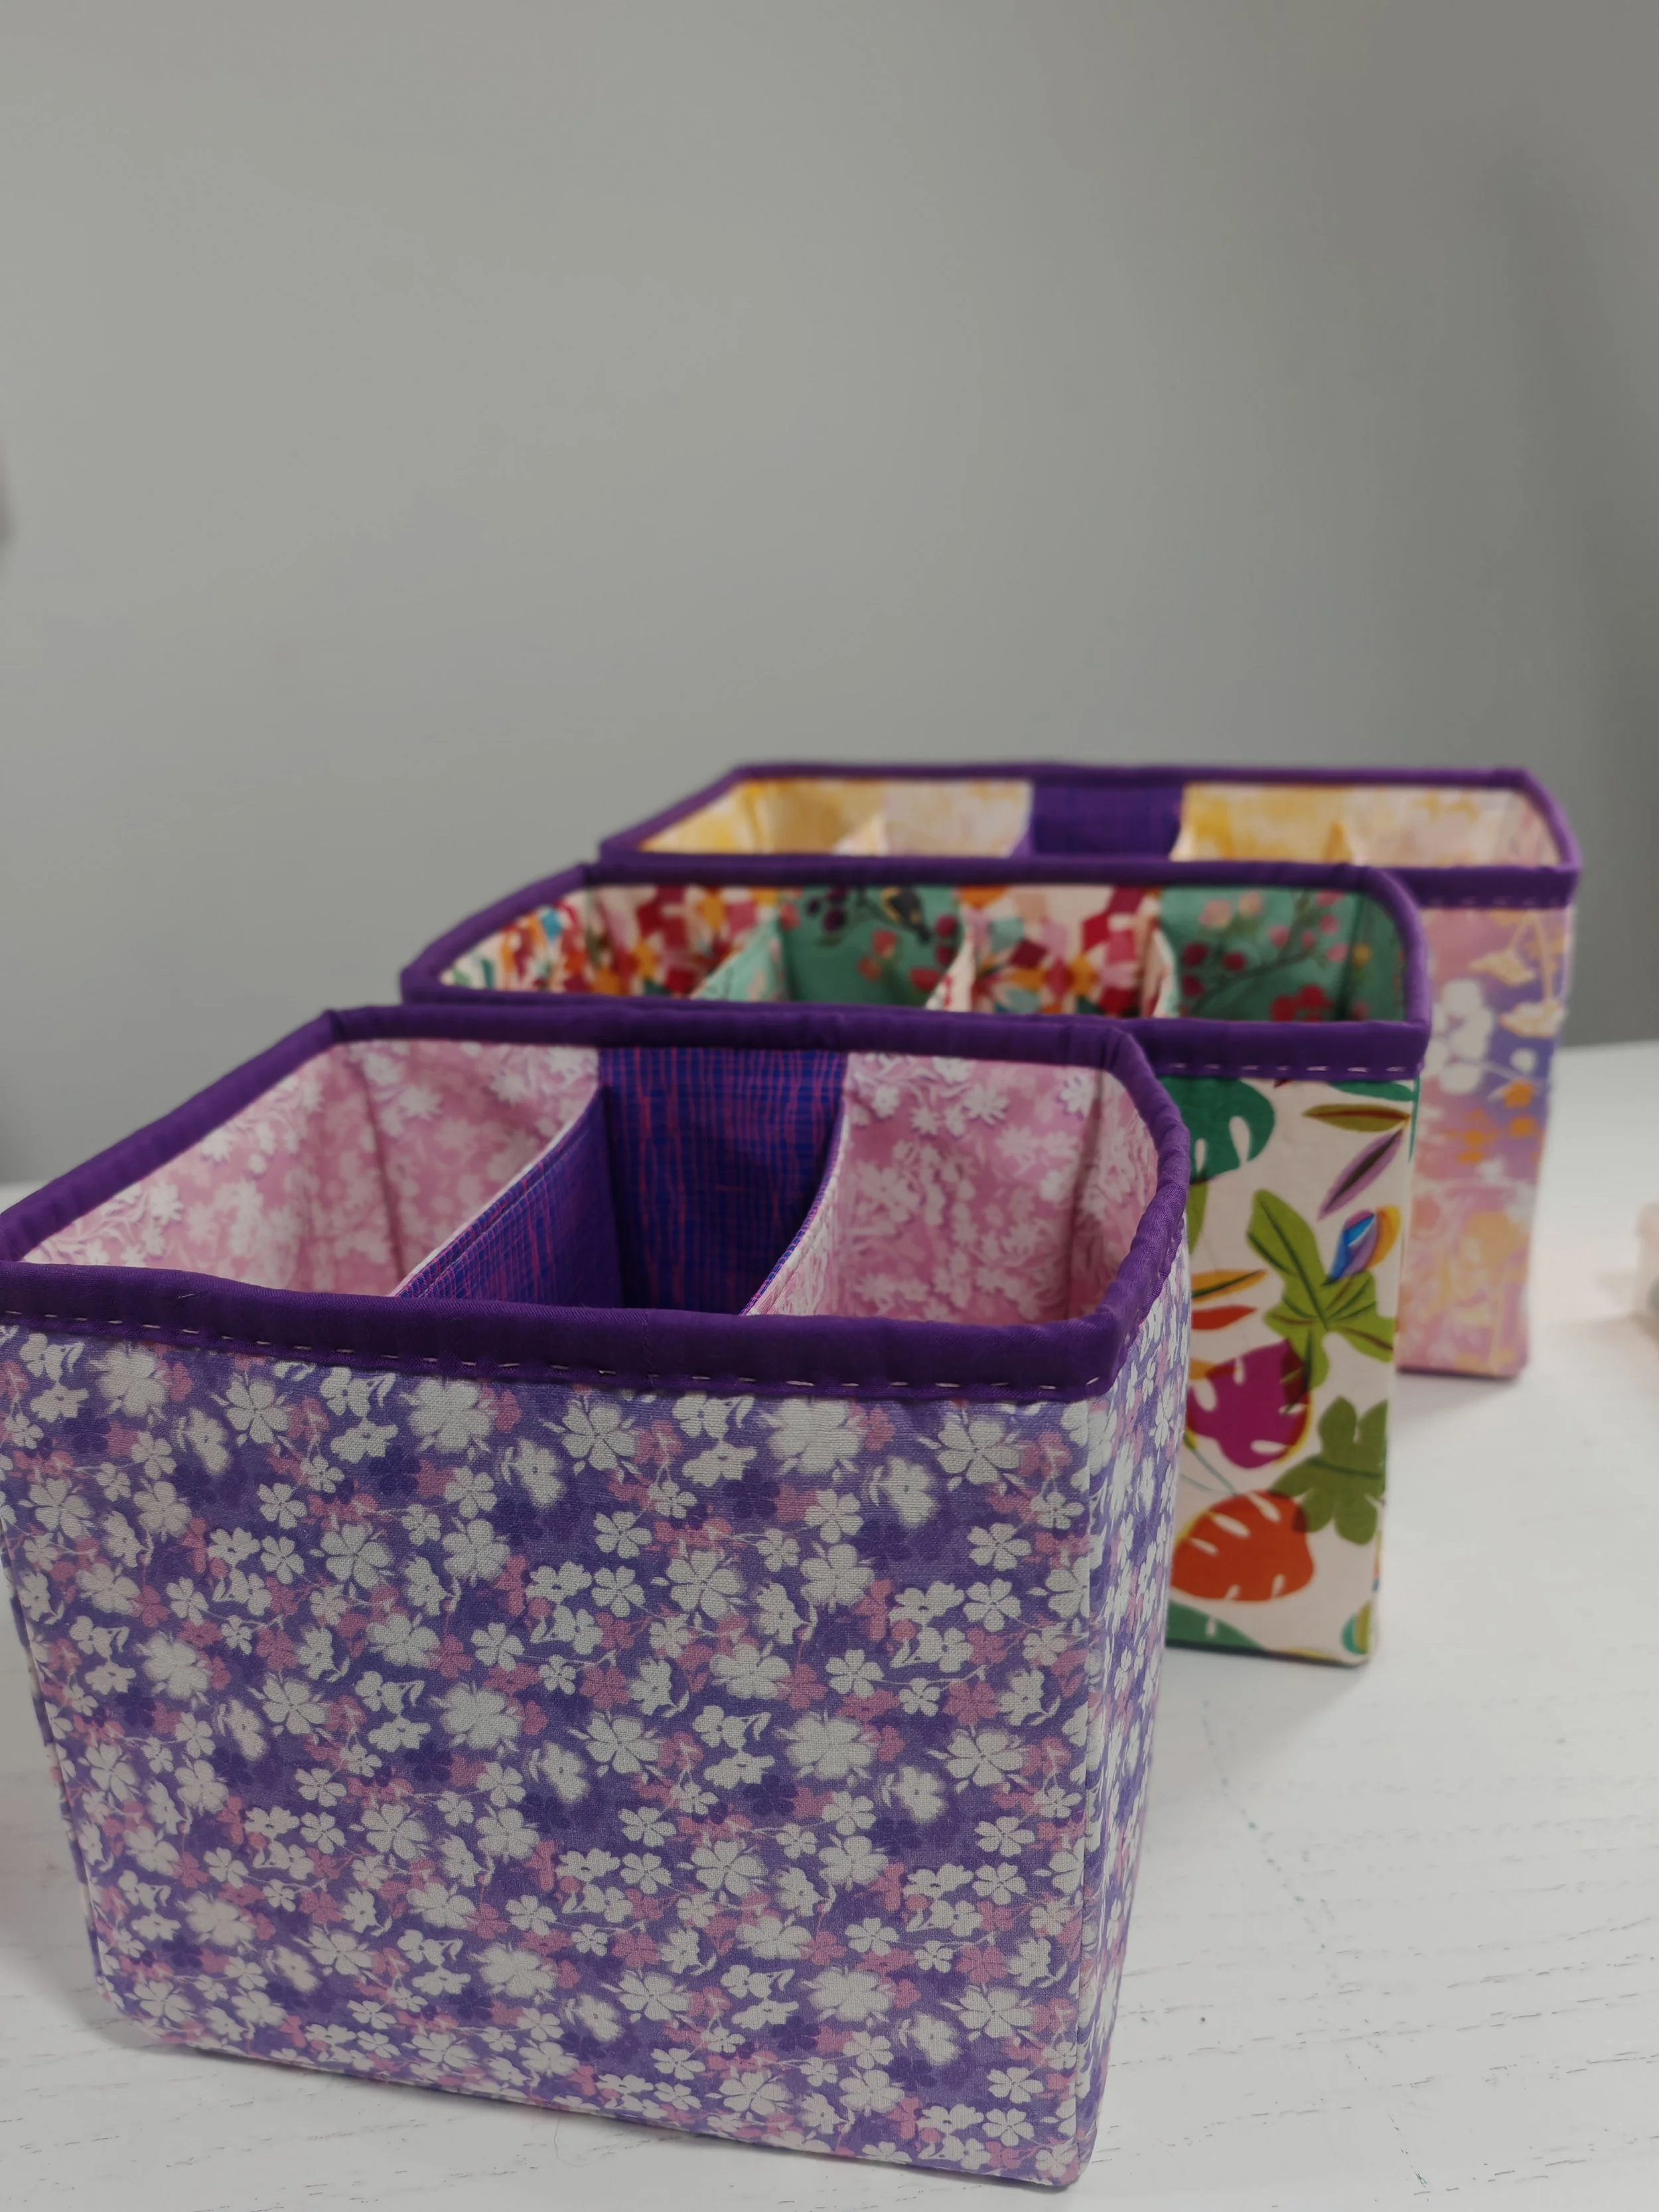
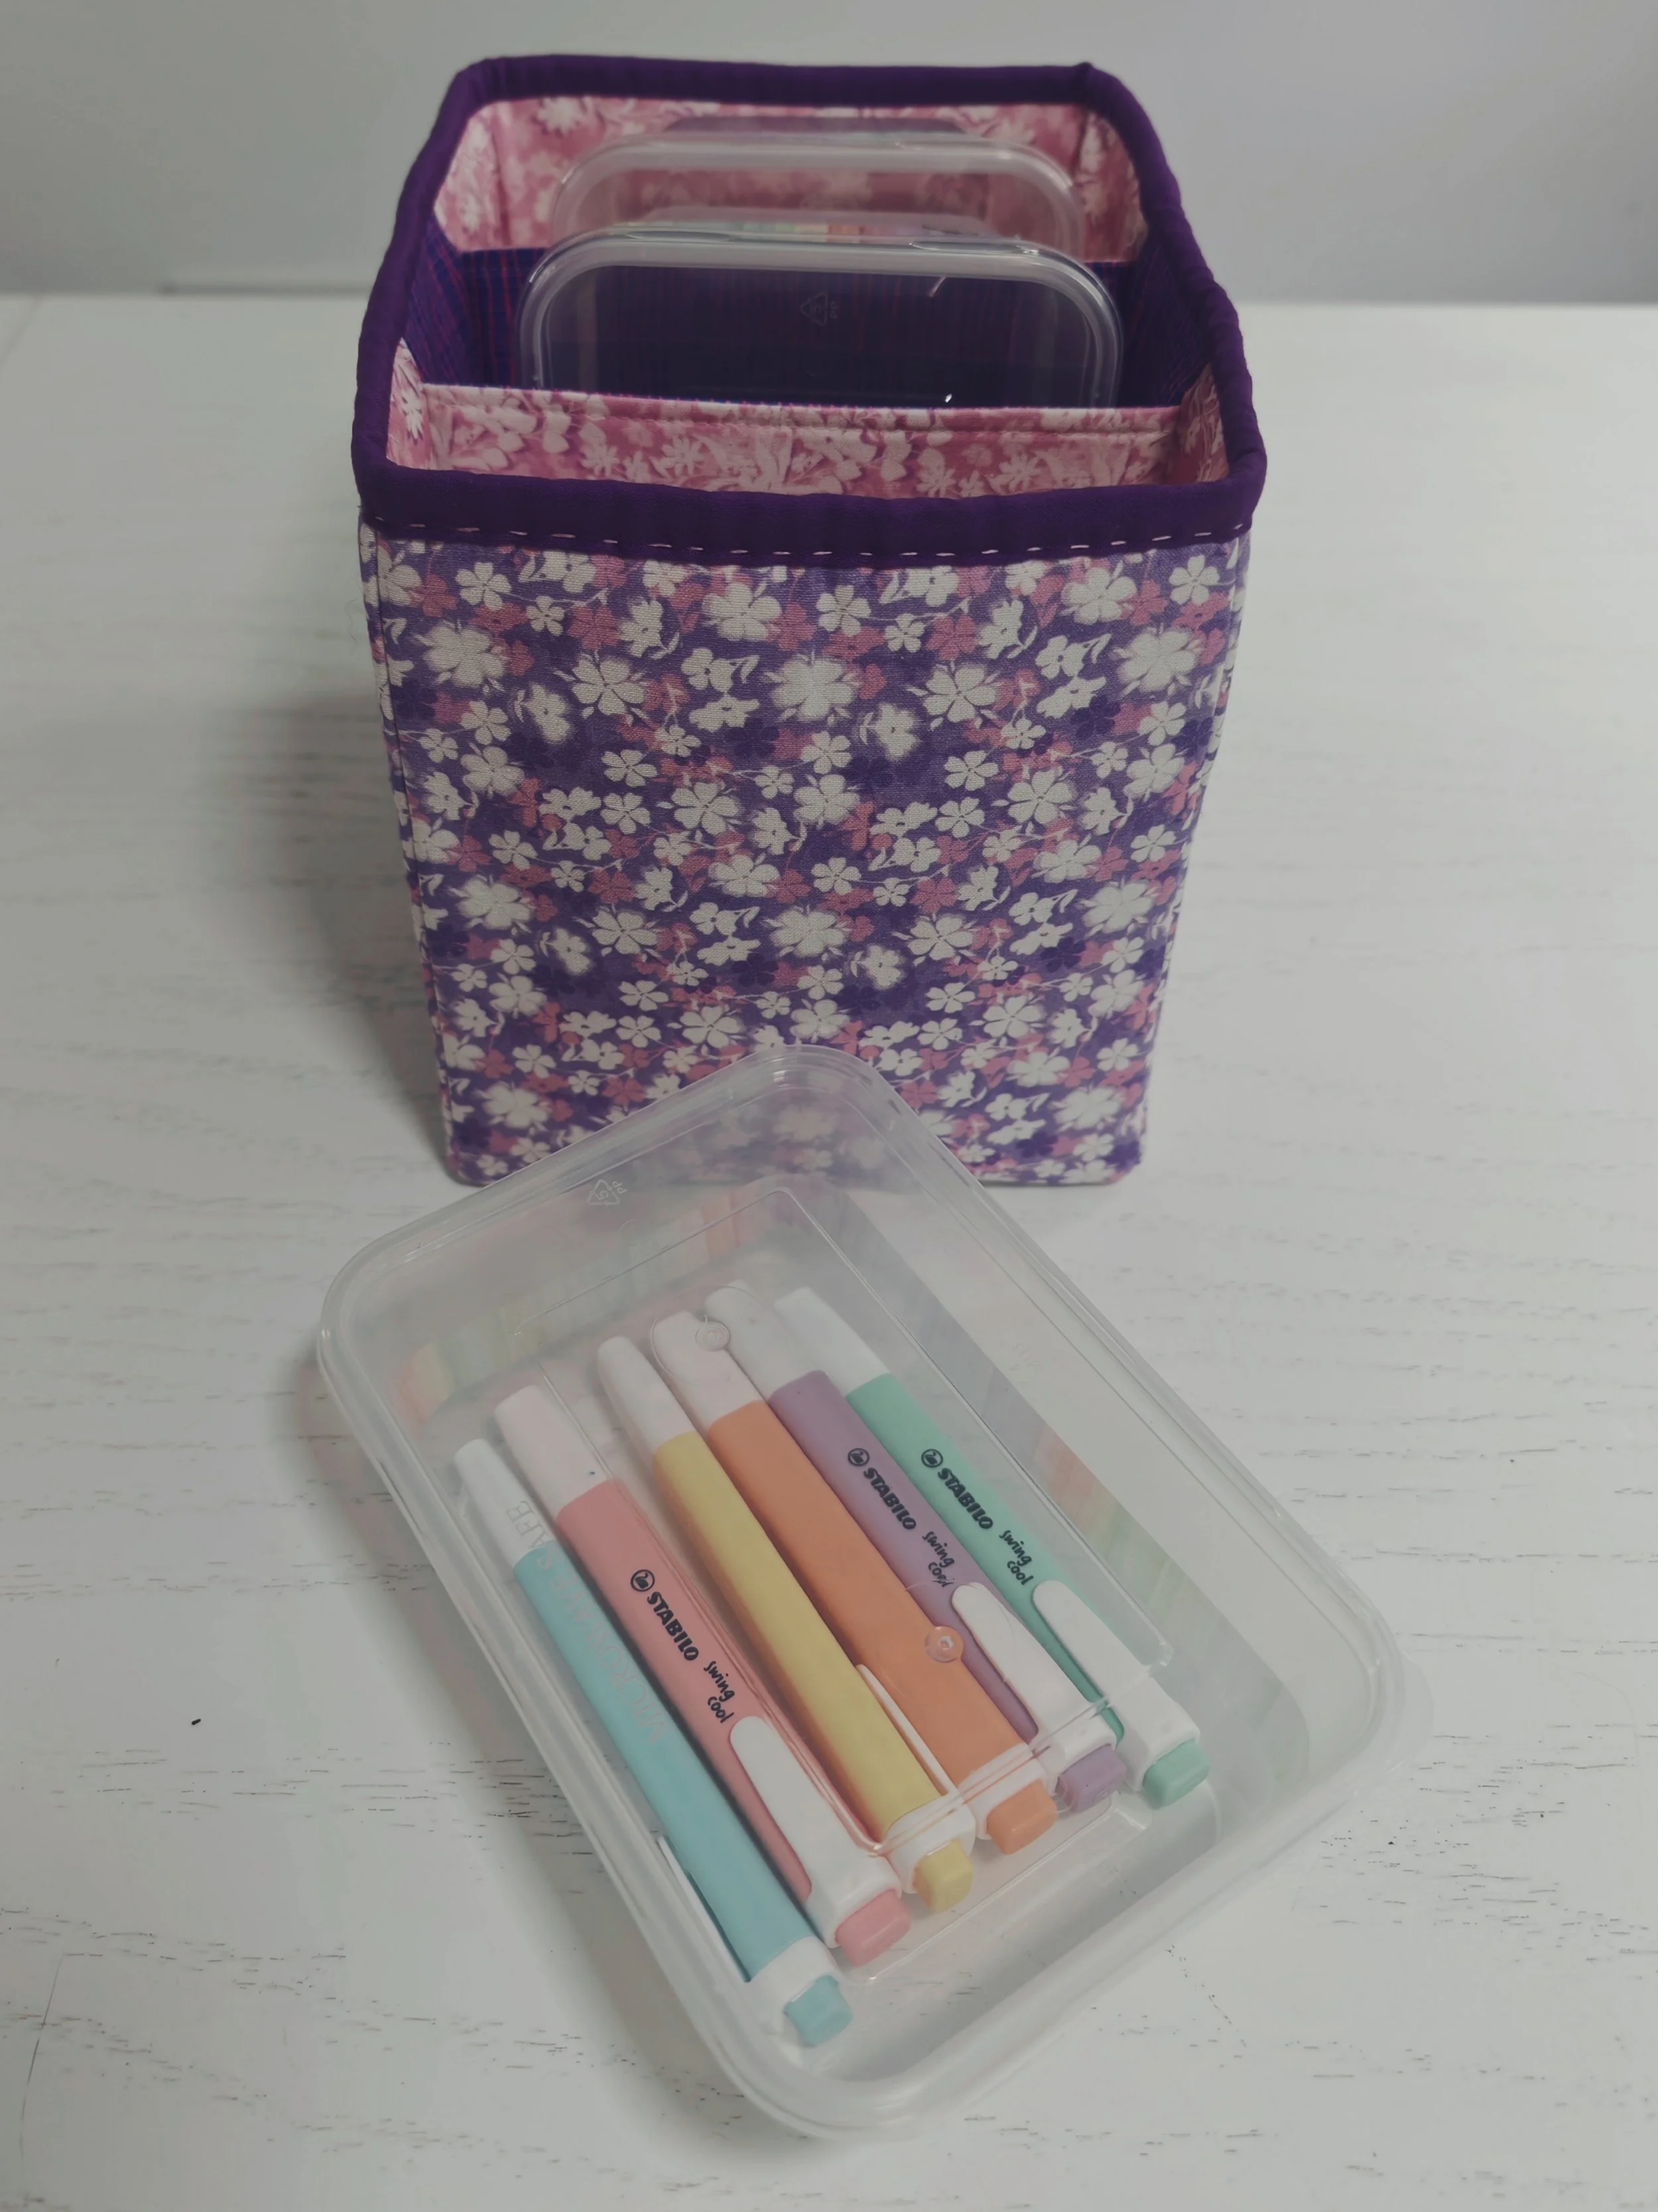
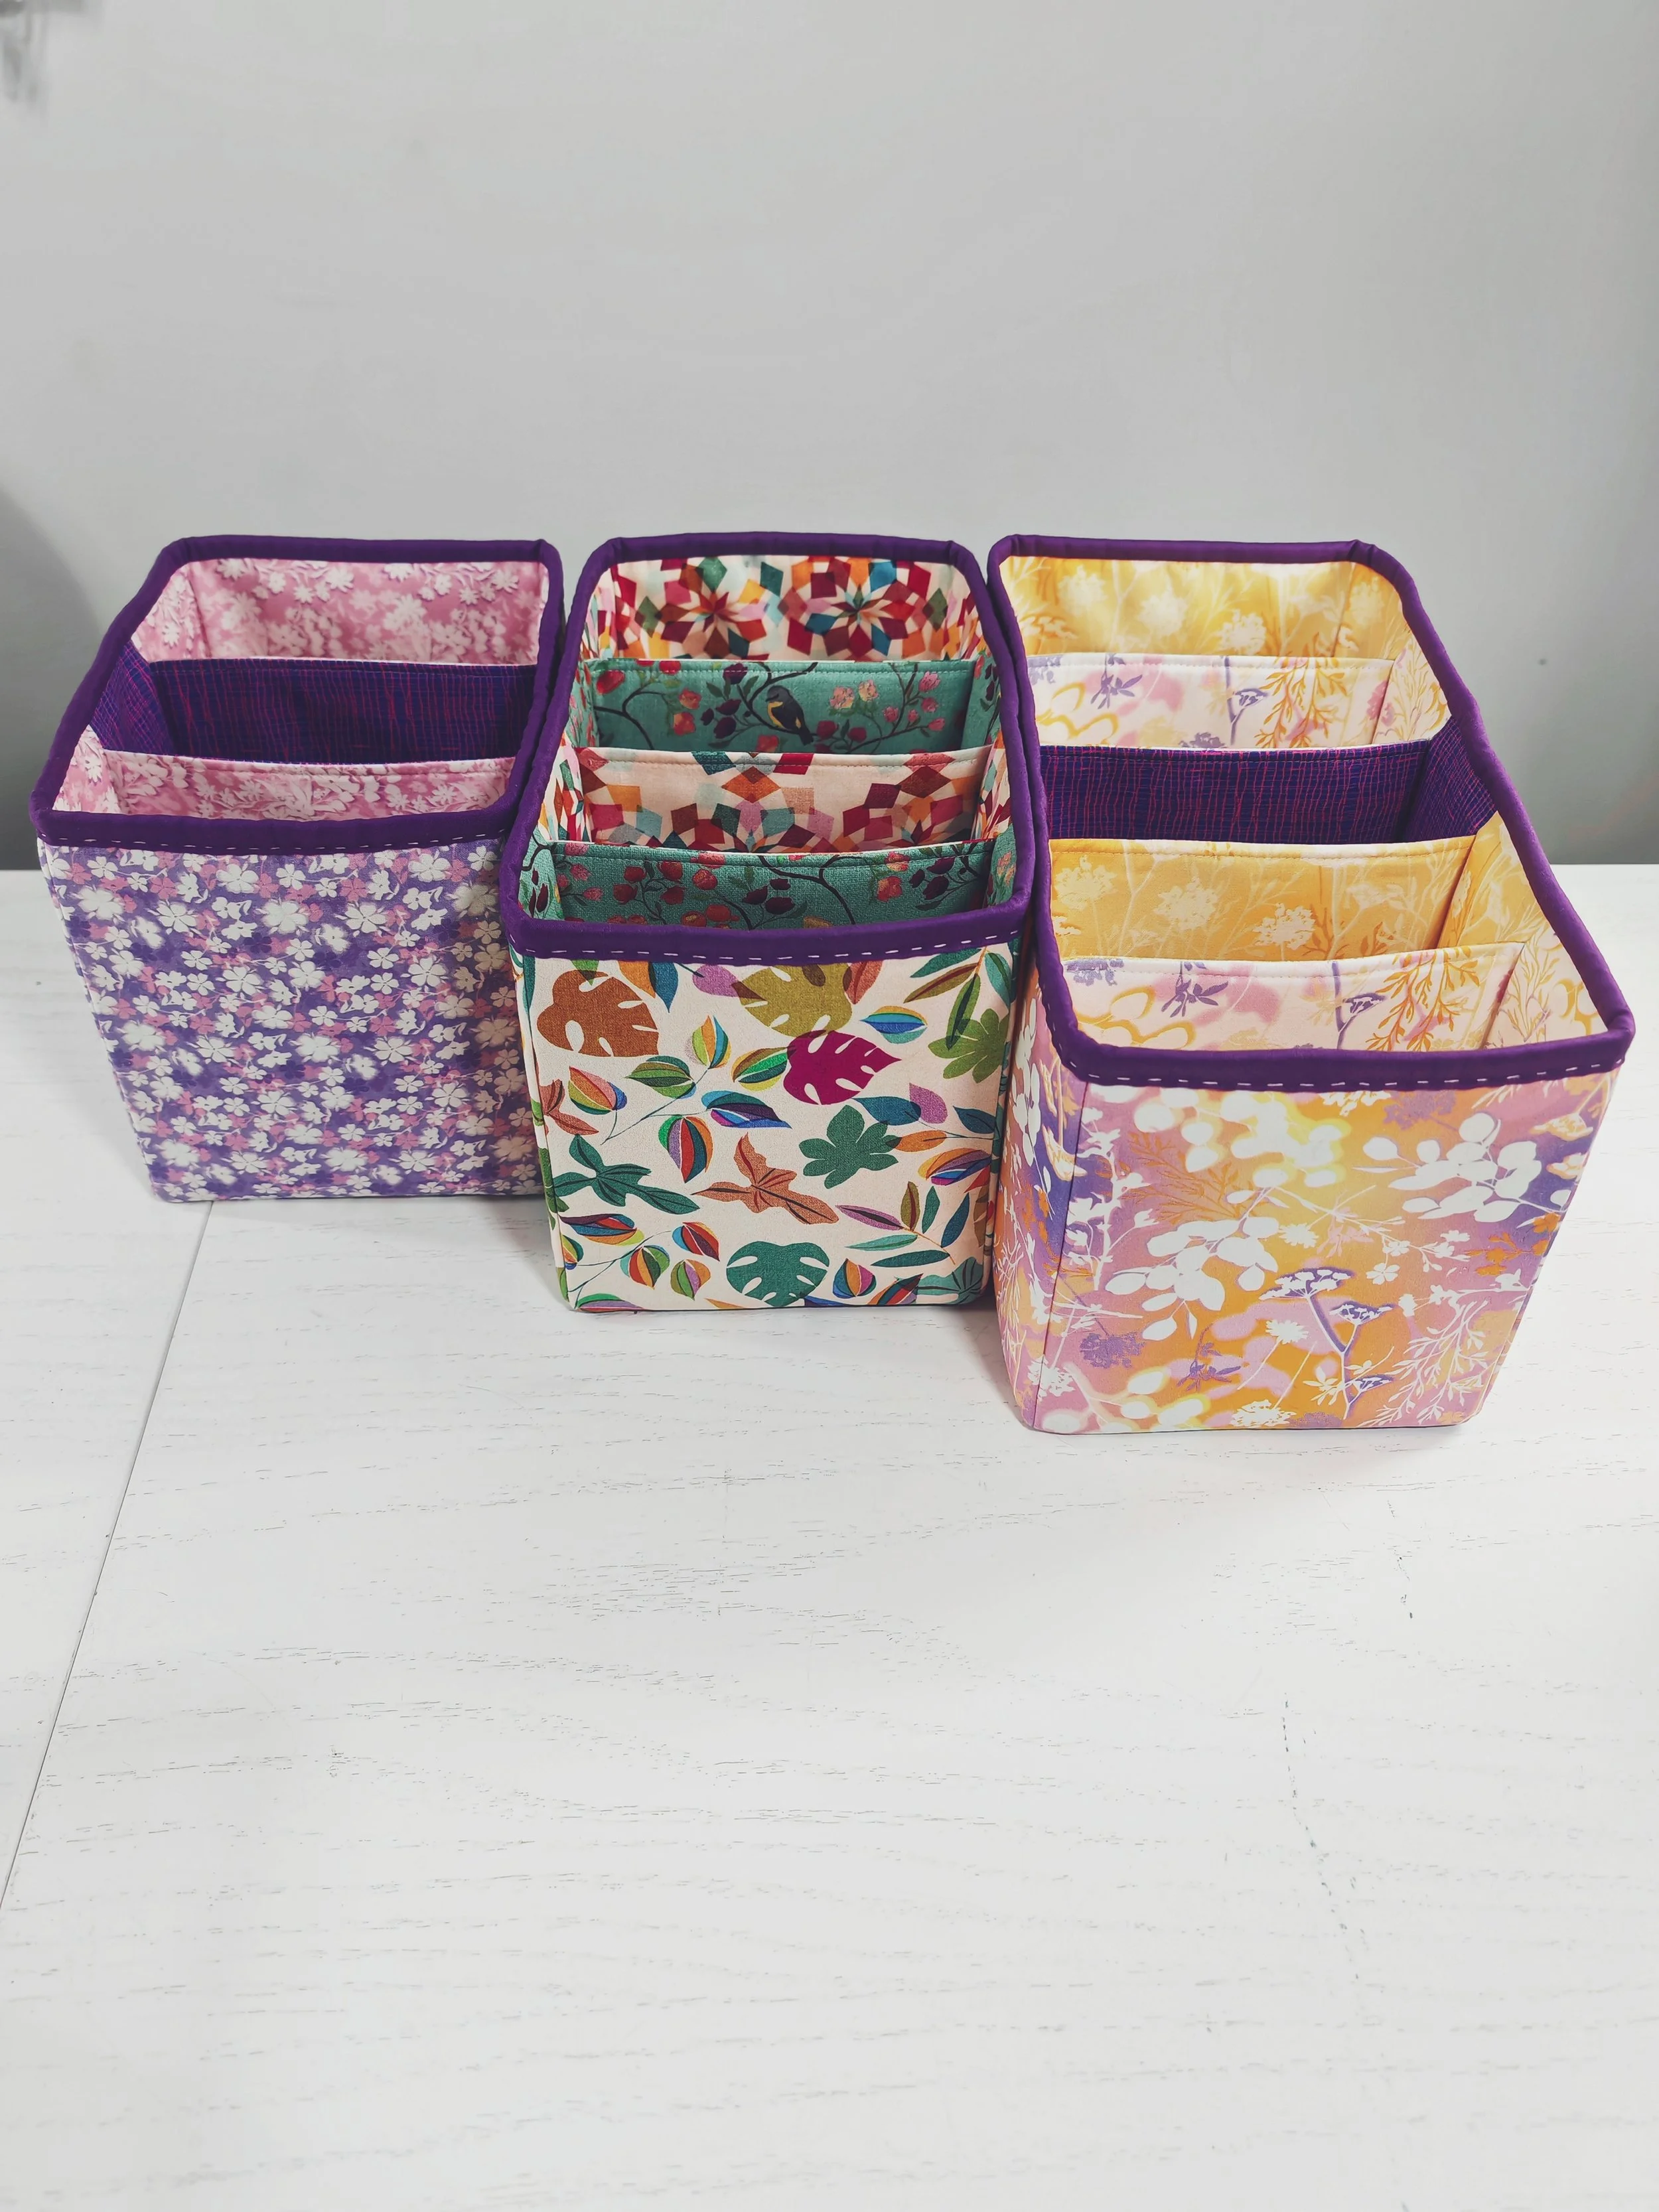
You can choose to make your caddy with three, four, or five compartments. All three sizes have fully divided sections, designed to hold note-books, card-making supplies, greetings cards, the list goes on! Or you can add a plastic storage box in each section to keep your chosen contents secure.
This pattern has a full tutorial video, which follows along each step. It is free to watch on YouTube. You can watch it here.
This is a downloadable PDF pattern sent to your email, not a physical product, and cannot be refunded once purchased.
PDF Pattern - £6.00 plus local taxes or VAT (press button to see price in your local currency)

In the photo tutorial, I mention two free downloads with extra information to help you achieve a great finish. Check out my foam preparation guide, and my binding guide.
-
Size 1 – 6” wide x 7” high x 8” deep
Size 2 – 6” wide x 7” high x 10½” deep
Size 3 – 6” wide x 7” high x 13” deep
-
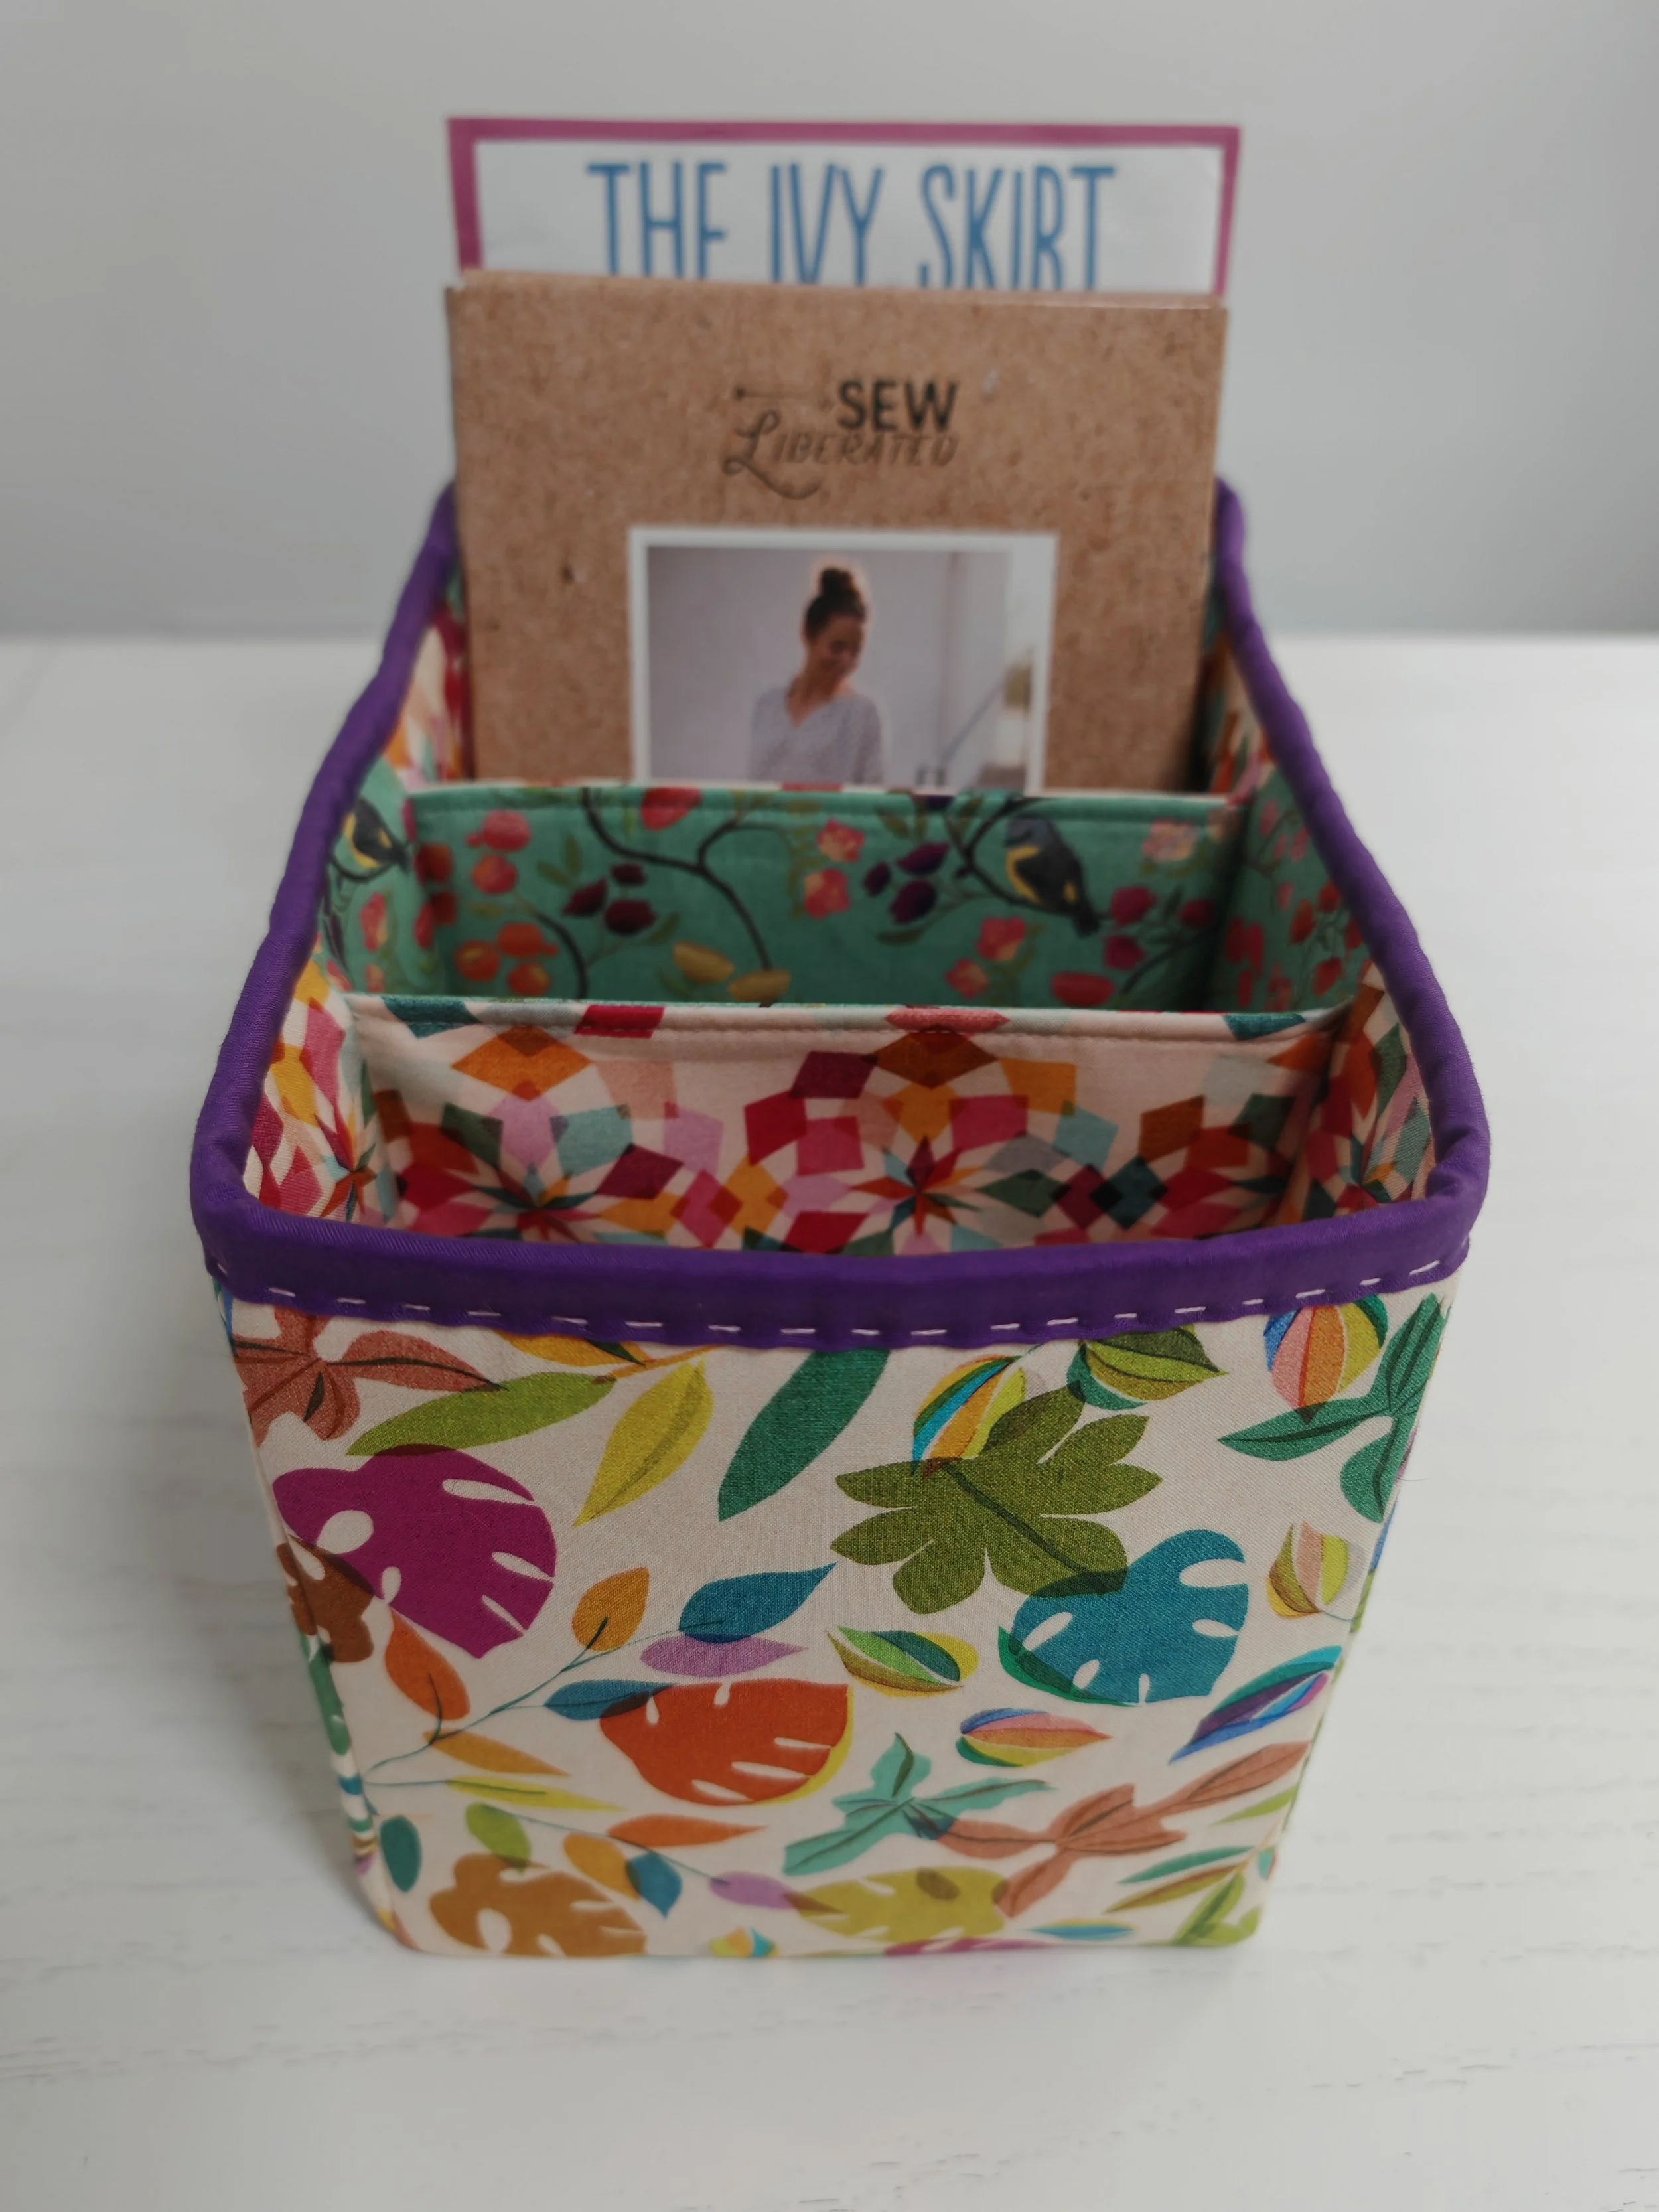
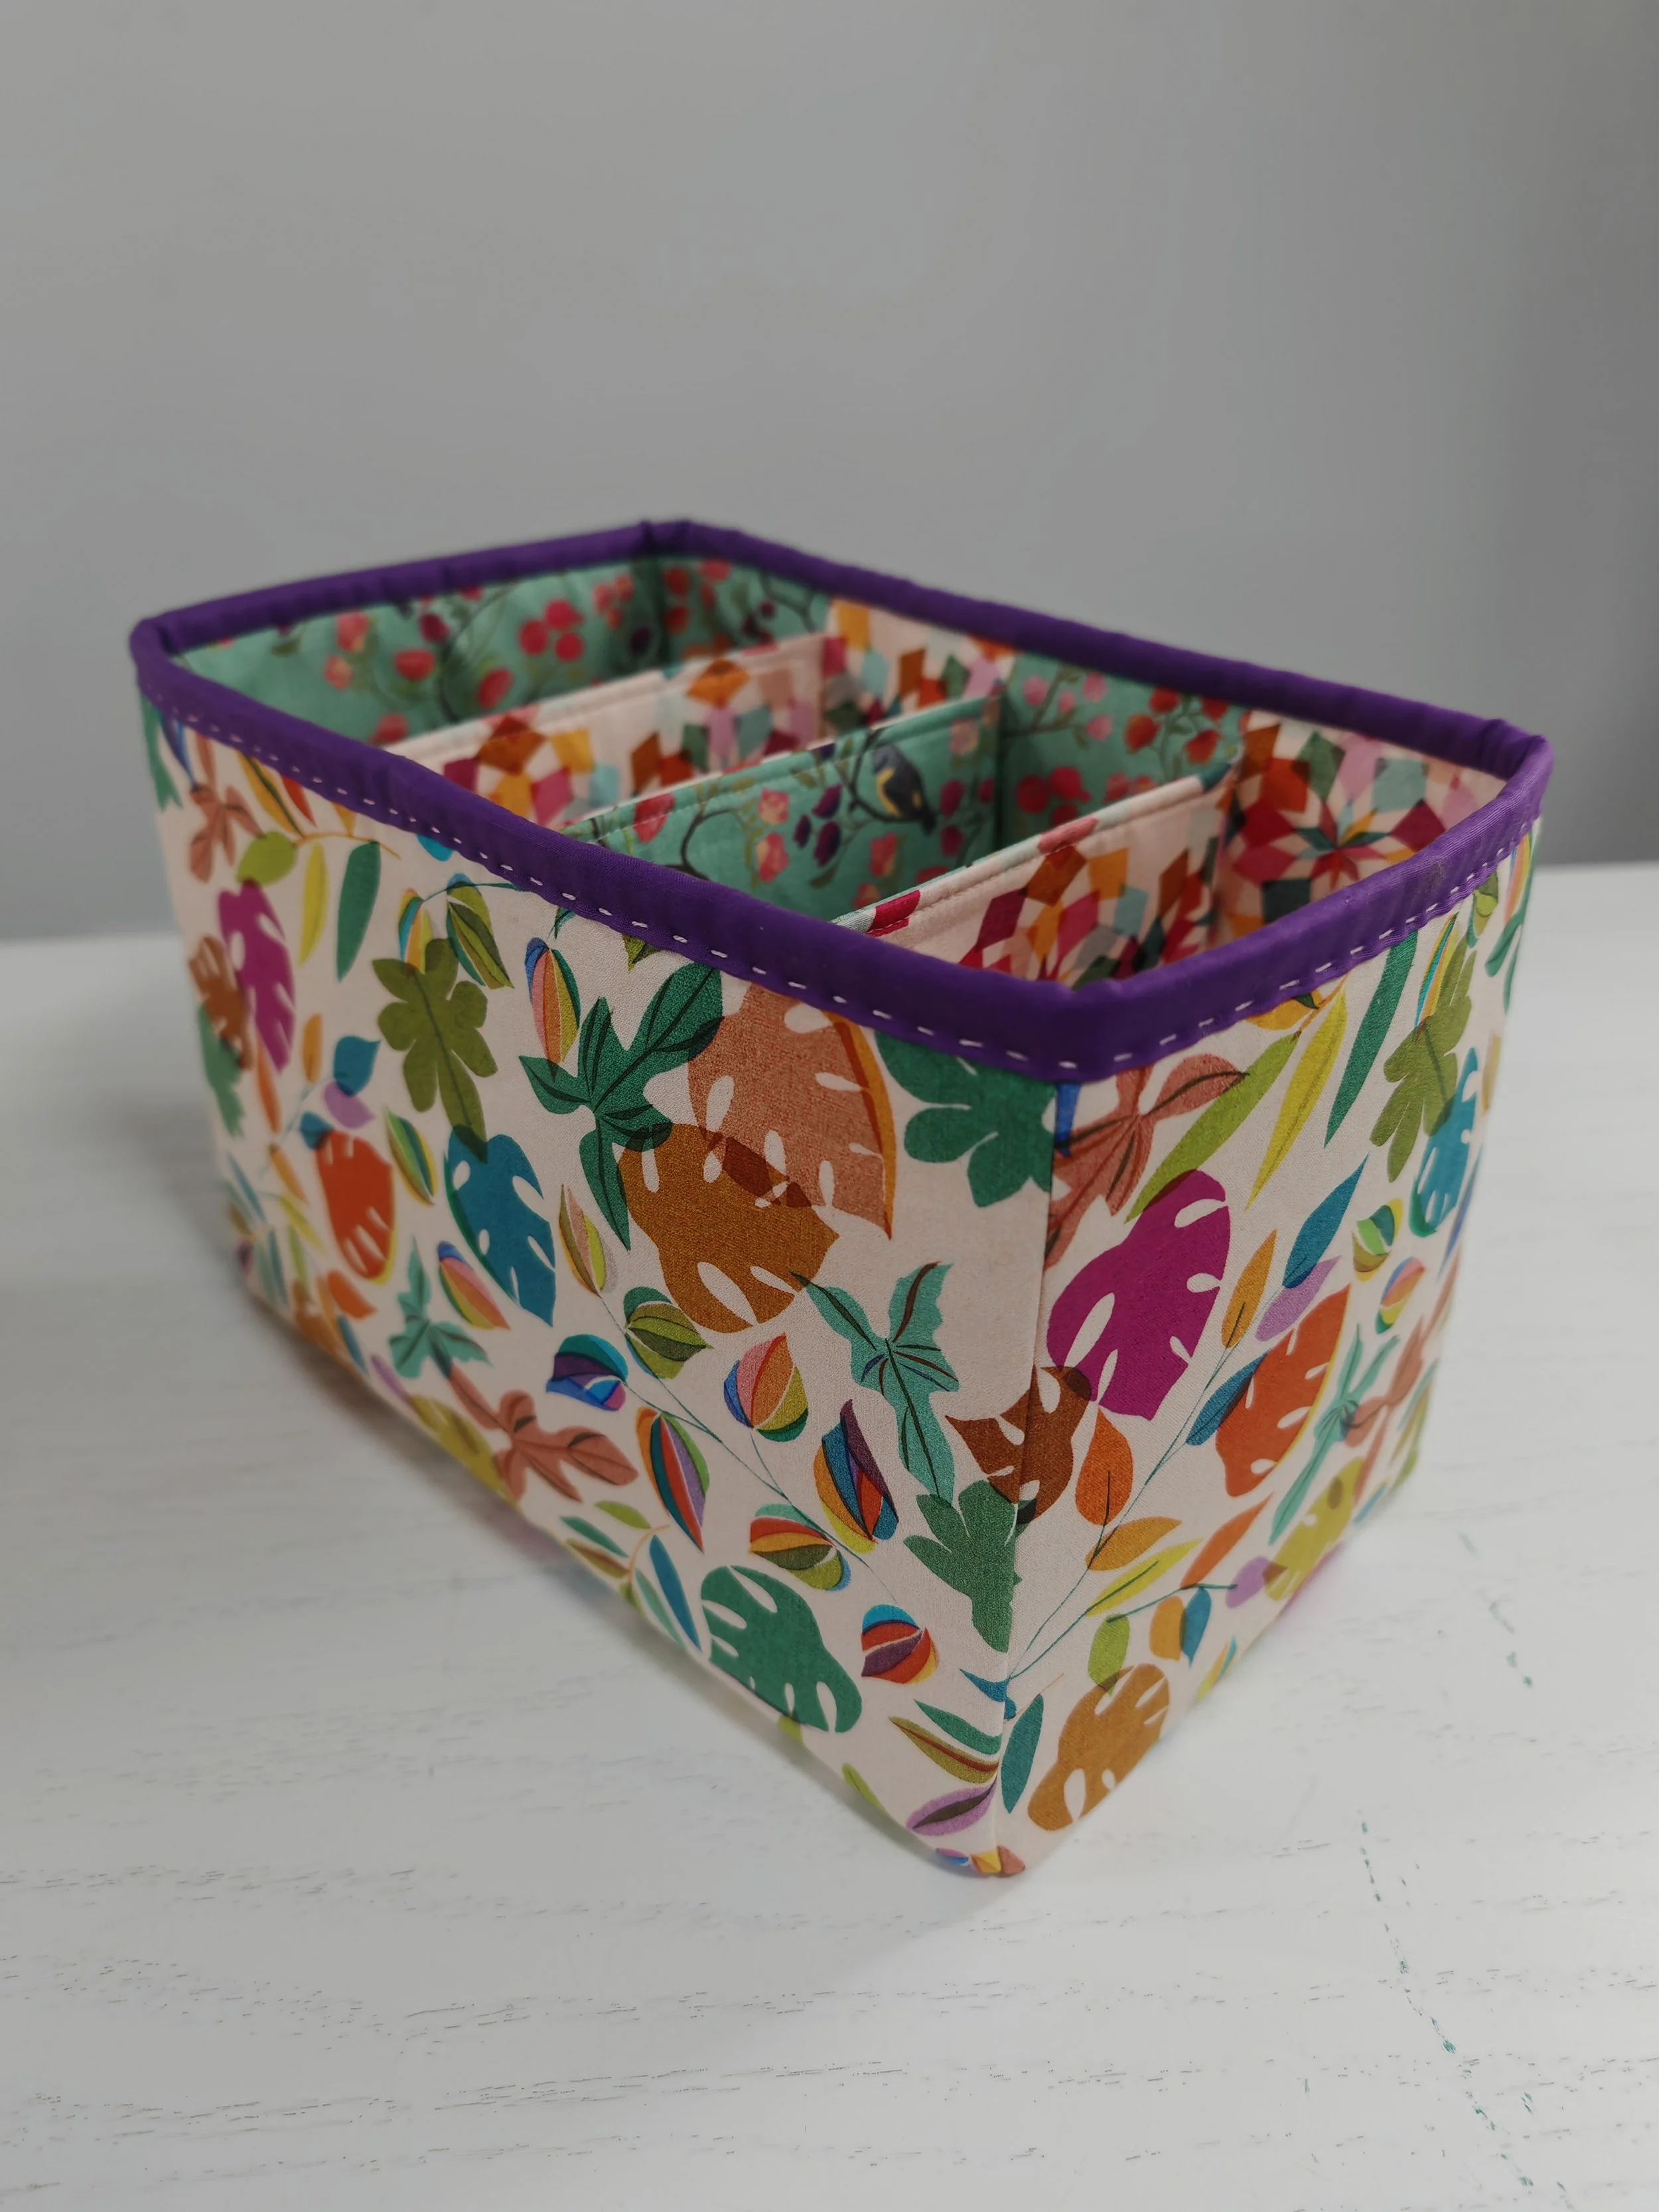
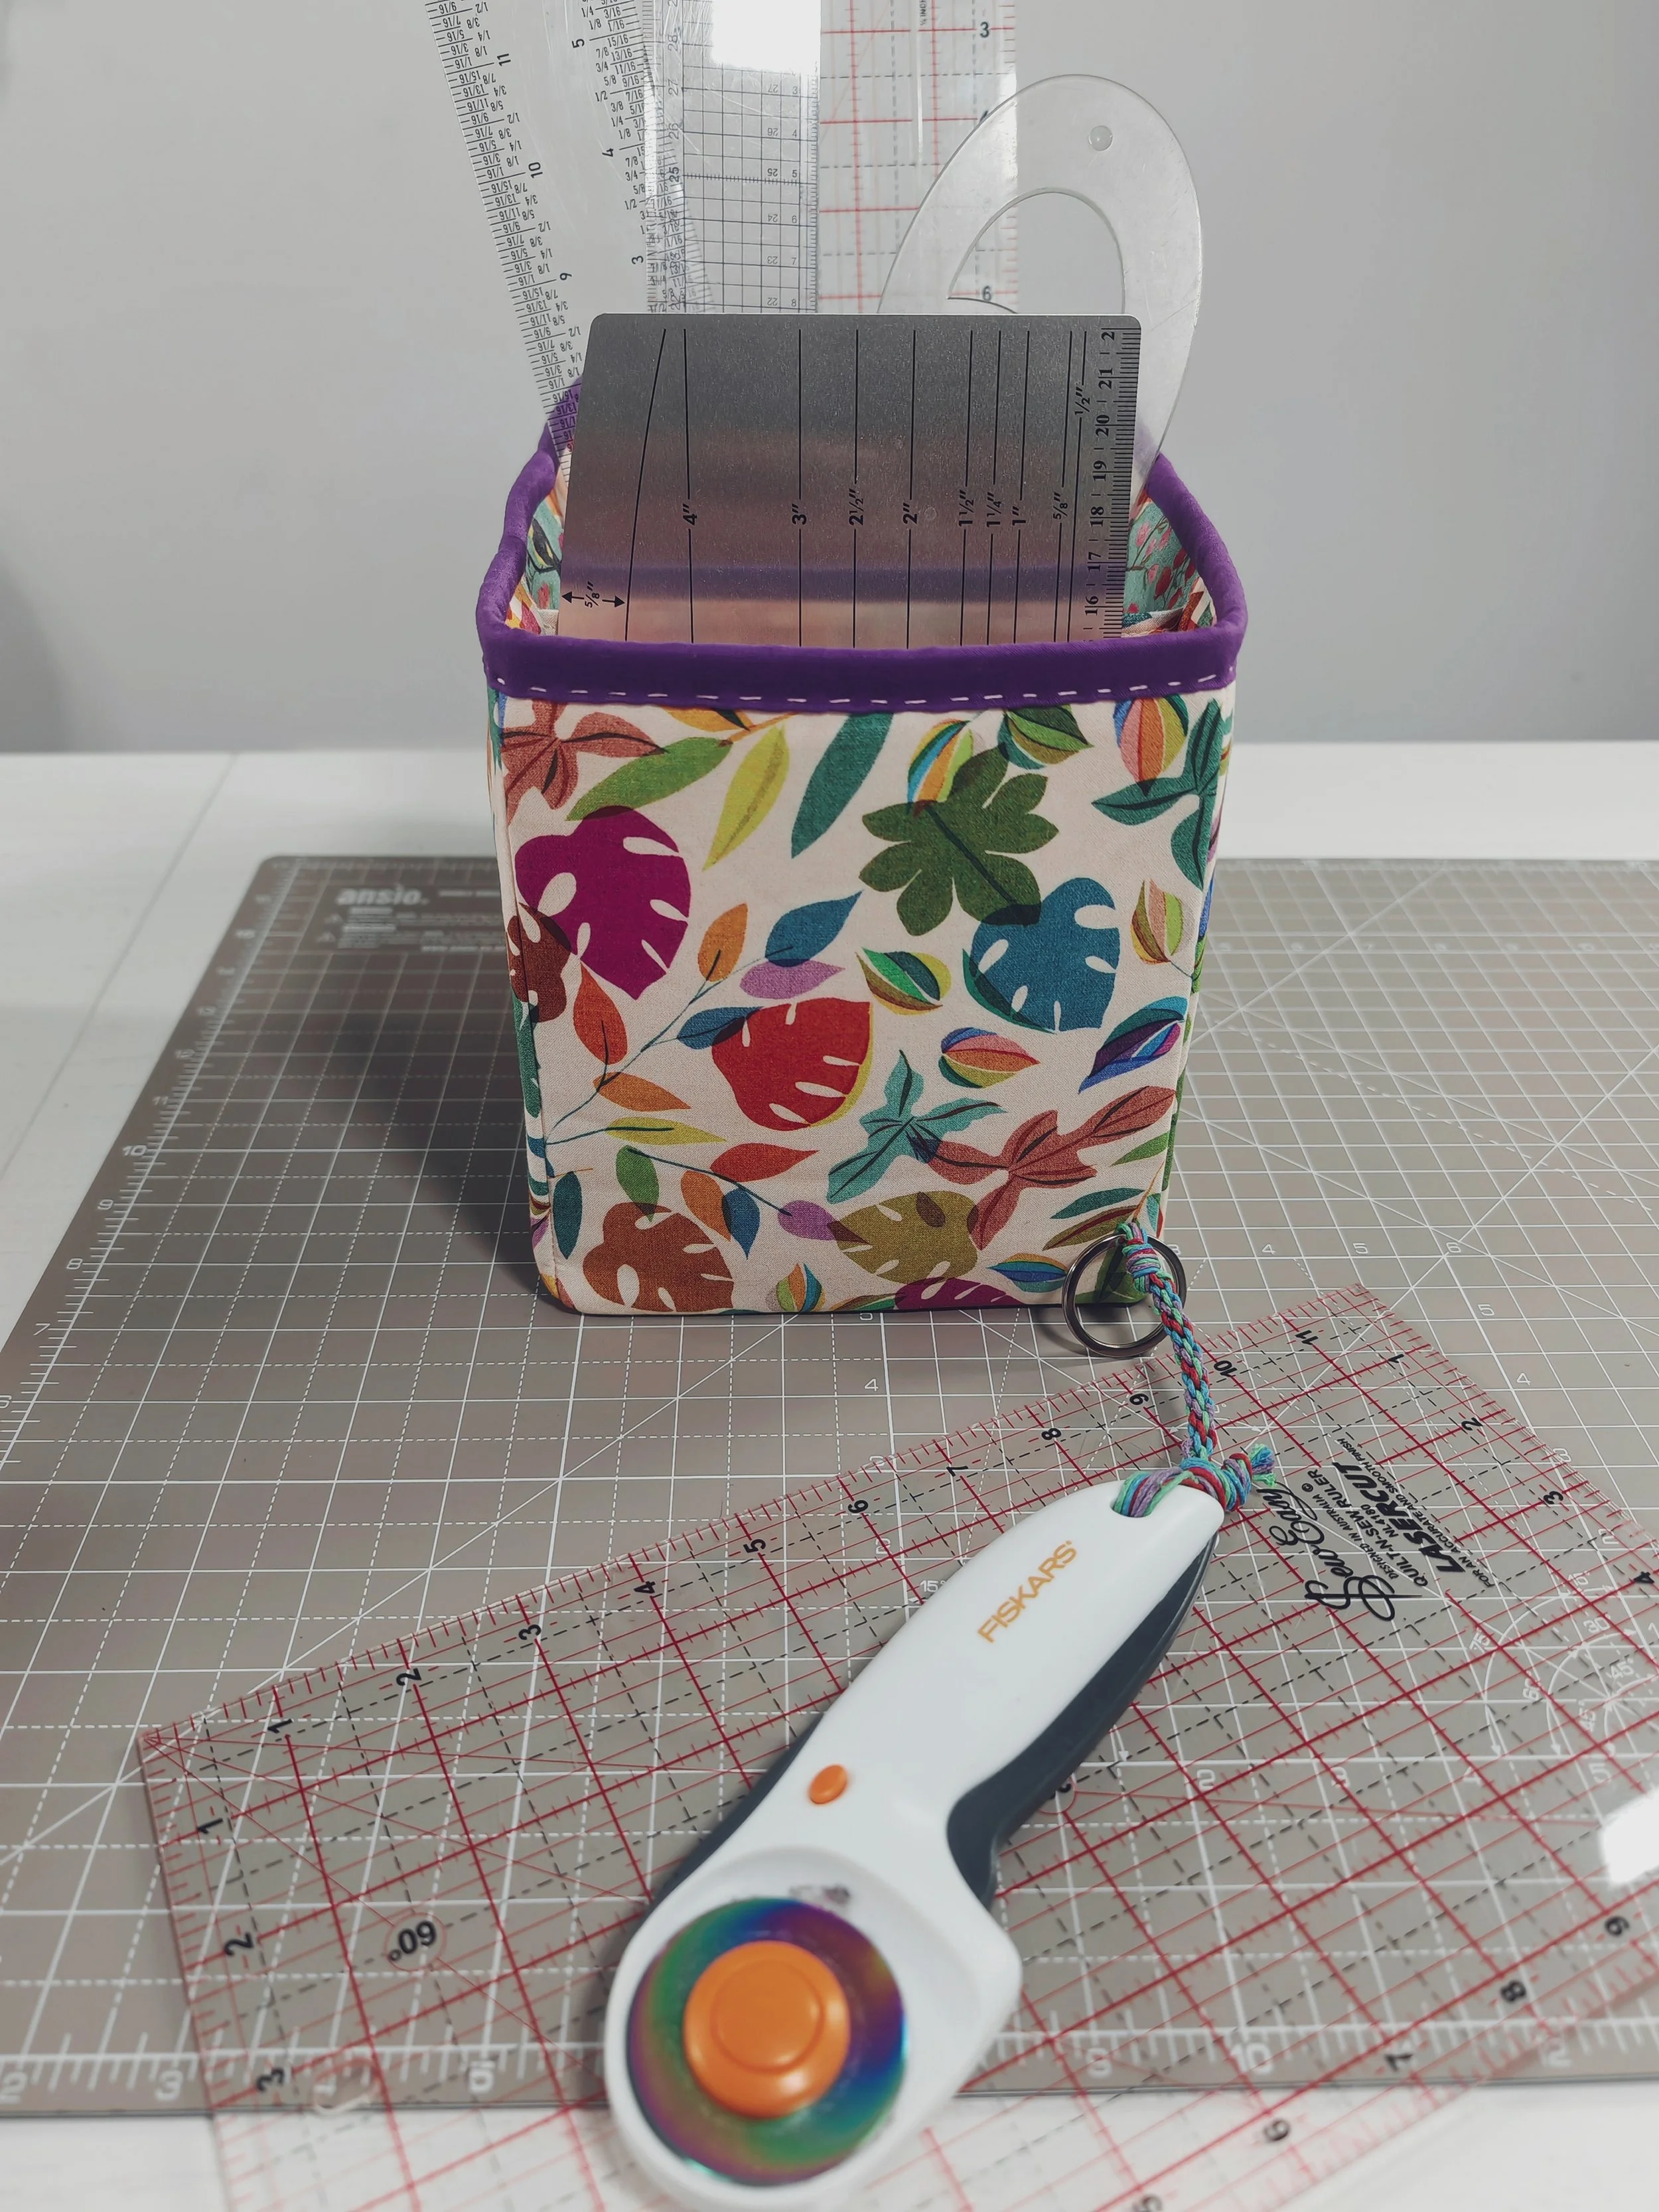
Each section is fully enclosed, so you won’t lose anything under the dividers
You can make the caddy using four fat quarters, so great for using pretty packs of coordinating fabrics
This pattern uses both foam stabiliser and stiffener, and there is a list of different options for each, so you can use whichever brand you can get
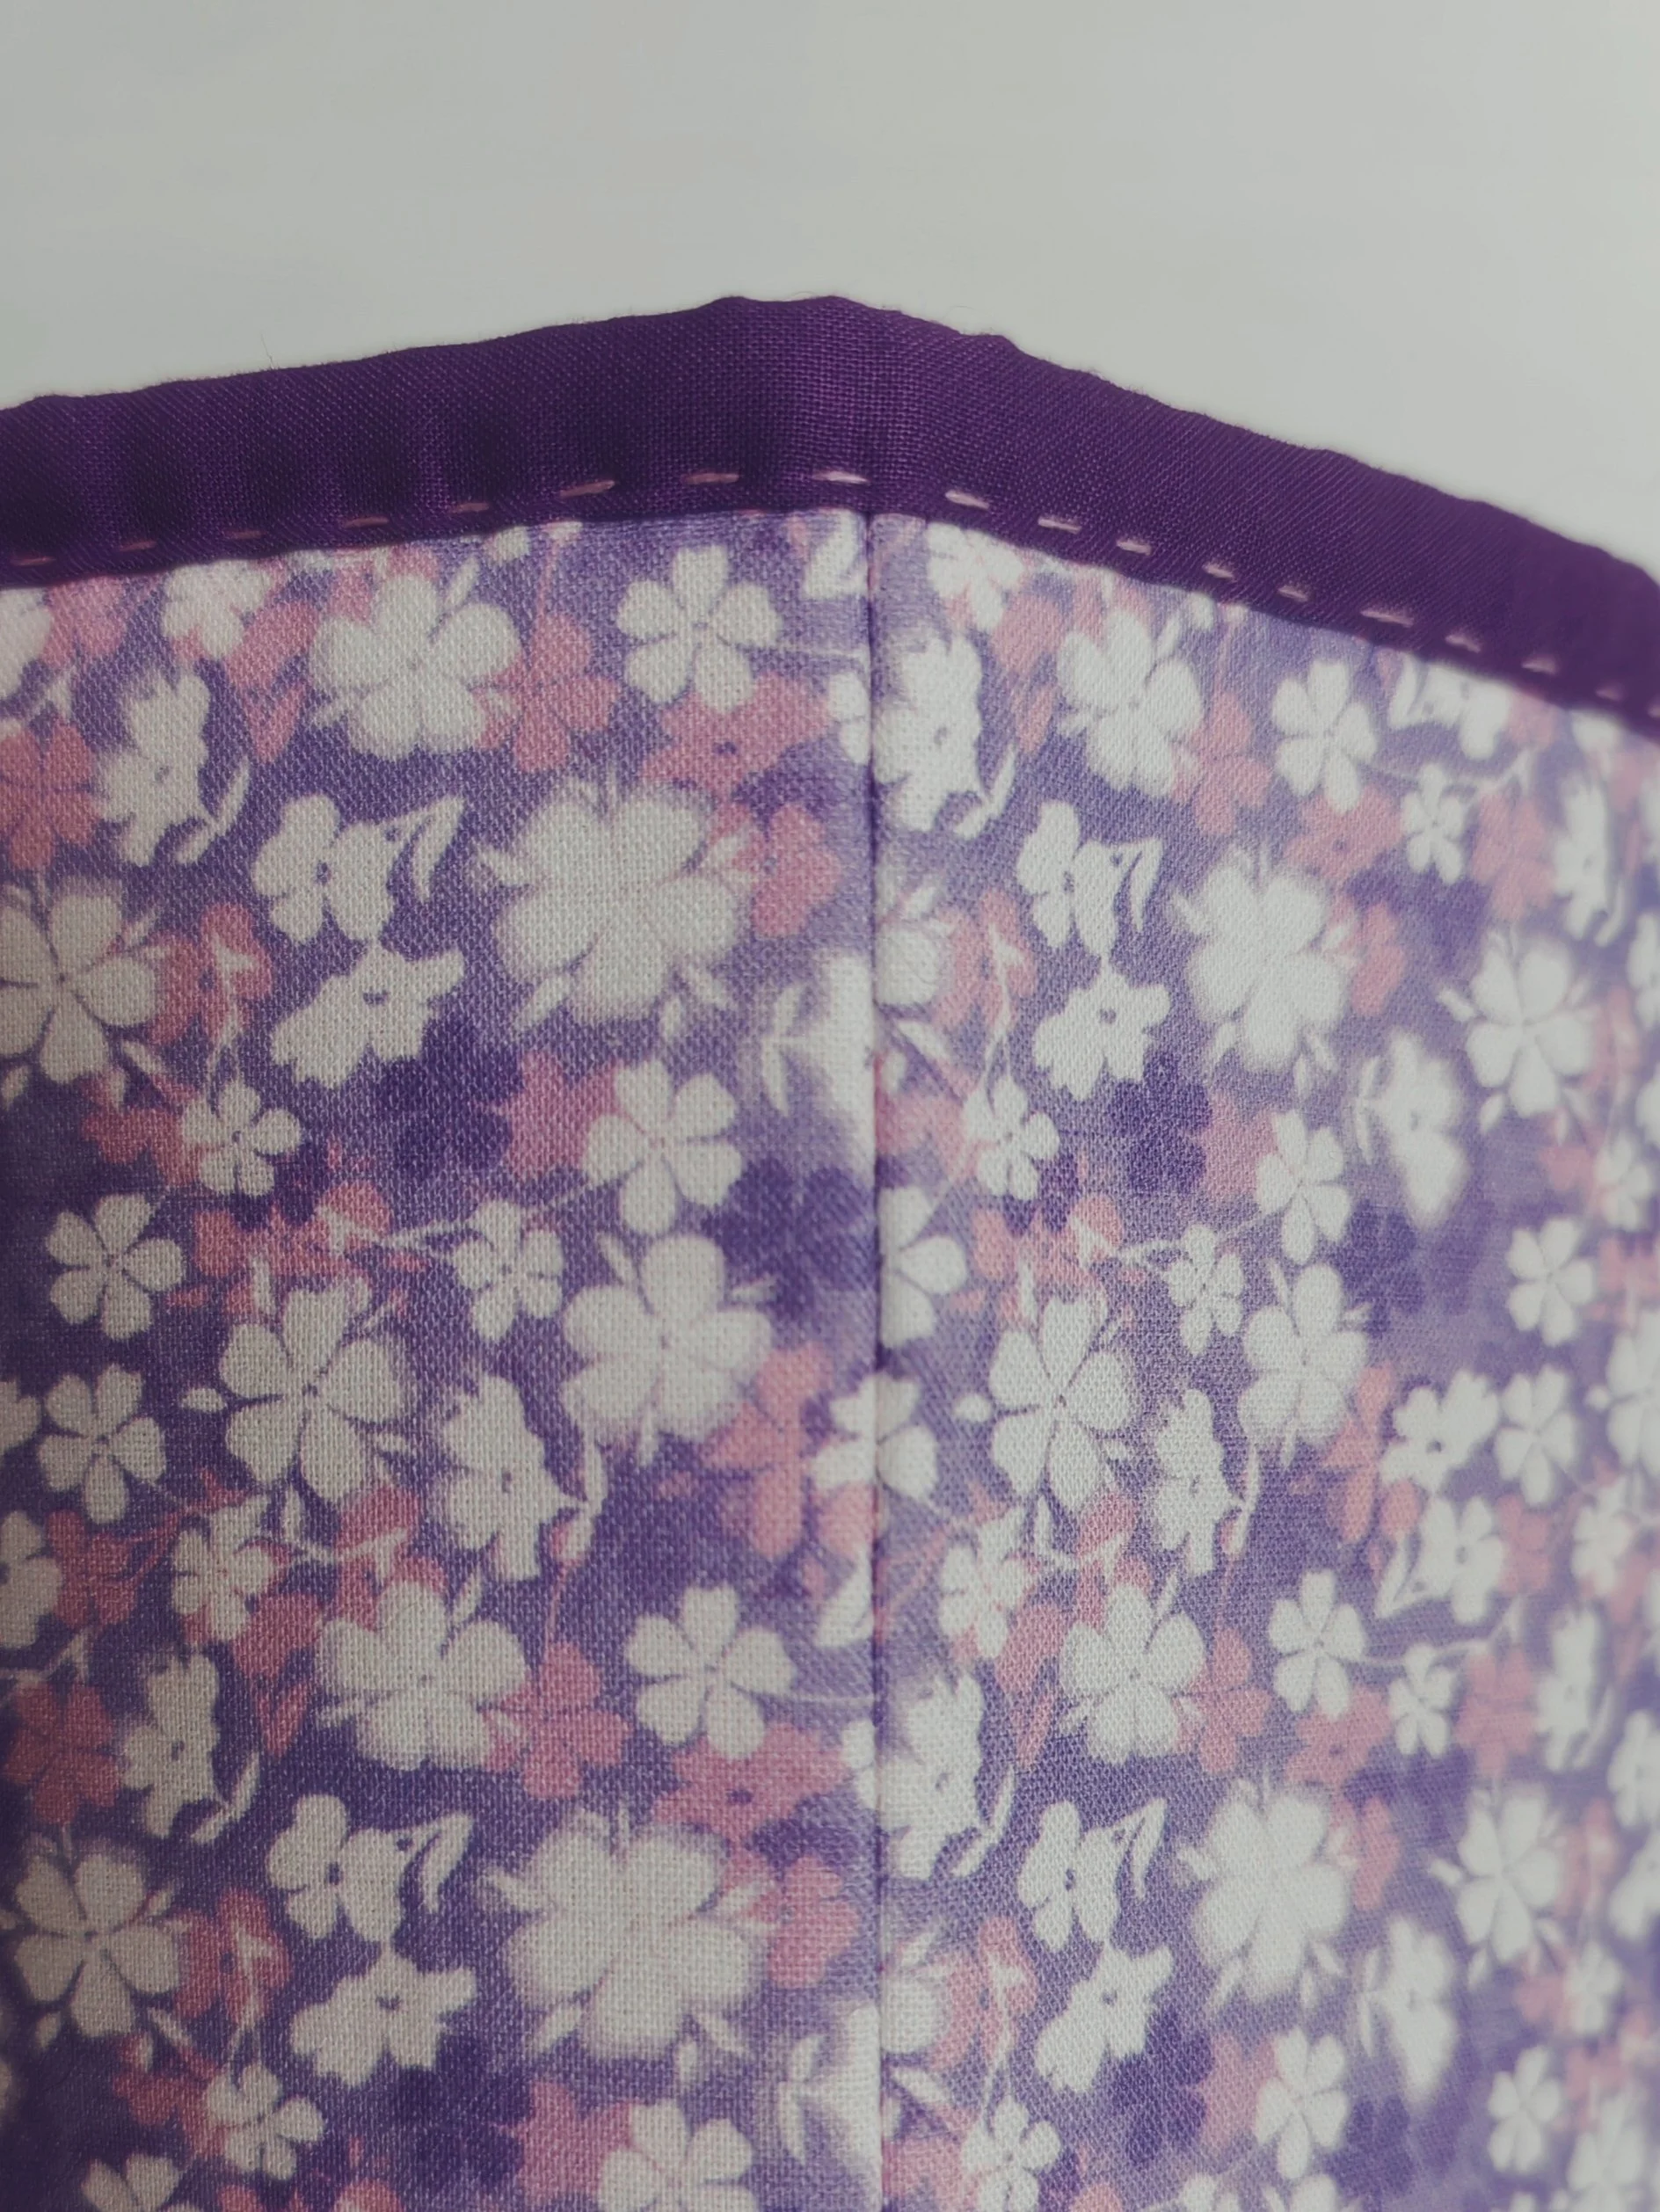
The binding at the top is hand-stitched with embroidery floss using a simple running stitch, making it easy to finish the binding neatly
The sections fit anything A5 or less, so you can store notebooks, fat quarters, or use plastic takeaway containers as drawers
Included as an extra are the instructions for making a loop to hang the caddy from a wardrobe rail, making it great for storing scarves or belts
As usual, this pattern is made up of full pattern pieces, and has plenty of dots and notches to make creating your caddy really easy!
-
You will need (width x height):
Quilting weight cotton:
Fabric A - 15” x 15”, 18” x 15”, ( 21” x 15”)
Fabric B - 15” x 12”, 17” x 12” , (20” x 18”)
Lining A - 20” x 16”, 20” x 16” , ( 20” x 16”)
Lining B - 19” x 10”, 20” x 16” , (20” x 16”)
Fusible interfacing: 36” x 26”, 36” x 31”, ( 36” x 31”)
Foam stabiliser: 22” x 15”, 22” x 22” , (22” x 22”)
Stiffener: 12” x 6”, 12” x 12” , (12” x 12”)
Embroidery floss: 40”, 50” , (60”)
Sundries: fabric marker, hump jumper
Optional extras: ¼” machine foot, fabric glue stick, fusible seam tape (to attach the foam)
-
Fabric A and B: Cotton quilting weight fabrics, used with a medium weight fusible interfacing; heavy-weight waterproof canvas; cotton canvas; denim
Lining A and B: Cotton quilting weight fabrics, with a medium weight fusible interfacing
Foam Stabiliser: Vlieseline Style-Vil; By Annie’s Soft and Stable; Pellon Flex-Foam; Bosal-in-R-form etc
Stiffener: Pellon Peltex; Vlieseline S80; Vleiseline Decovil 1 Heavy; thin cutting mats (make sure you can stitch through them)
Fusible Interfacing: Any medium weight fusible interfacing, woven or non-woven
-
The PDF comes as two separate files. The first contains a simple, six-step tutorial with twenty photos, enhanced with graphics to make it clearer to understand. The second file contains the pattern pieces, ready for you to cut out and use. All sizes are in inches.
INCLUDED:
A list of all the materials and quantities you need to complete both projects
Cutting layouts for all fabrics
Instructions on how to cut and prepare the fabrics
Step-by-step instructions including photos of each step
Photo tutorial and pattern pieces ready for printing
THIS IS A DOWNLOADABLE PDF PATTERN SENT TO YOUR EMAIL, NOT A PHYSICAL PRODUCT
PDF Pattern - £6.00 plus local taxes or VAT (press button to see price in your local currency)
Share your project with the hashtag #versatilestoragecaddy
If you tag me @hazelapatterns, I will share your fabulous make on my pages!
Photographs by Hazel A Patterns